This post may contain affiliate links. Please see our disclosure policy.
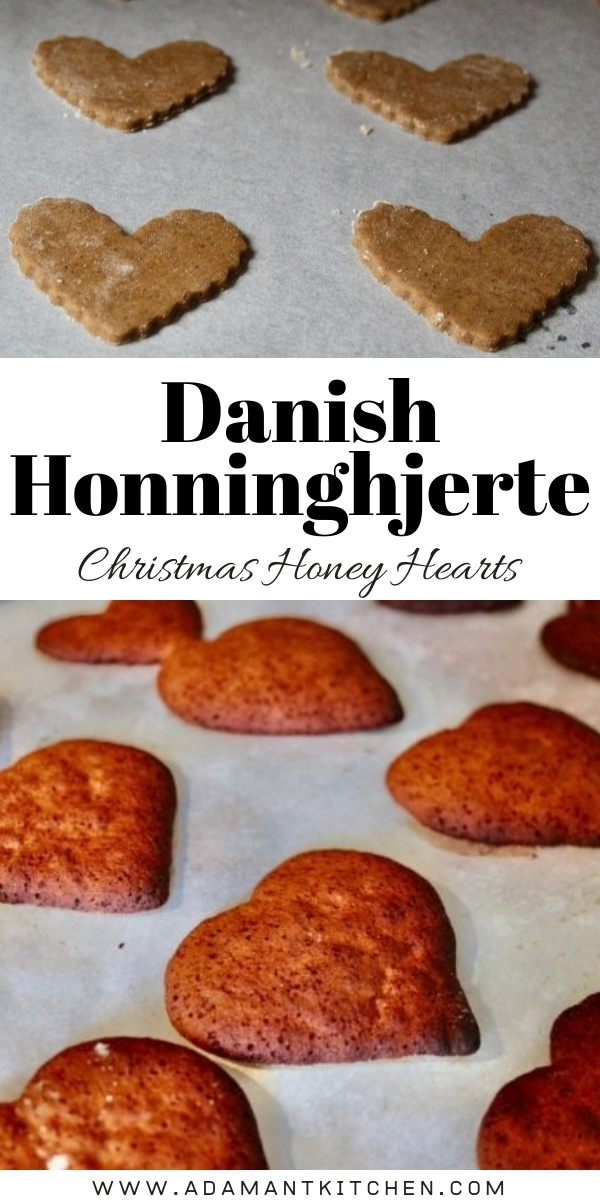
Honninghjerter, or Honey Hearts, take a long time to make (literally months), but don’t require much effort and their spiced honey goodness is worth the wait.
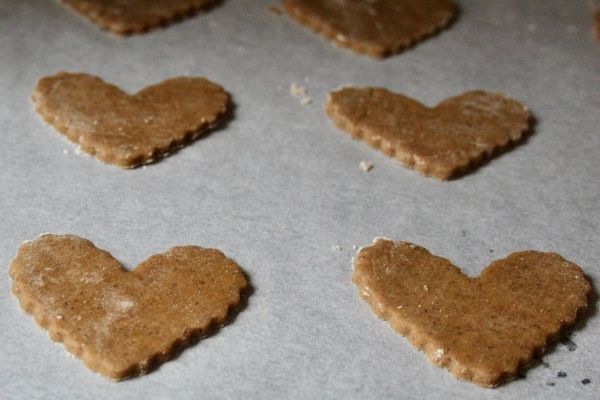
Honninghjerter are something Danes only eat at Christmas time. Few make them at home since you have to really do some pre-planning. It’s a shame because the homemade ones are superior to most store-bought honninghjerter.
Nonetheless, honninghjerter holds a dear place in most Danes’ hearts. We even have at least one song they are featured in and it’s not even a Christmas song.
Bakeries usually sell a lot of honninghjerter decorated with a gloss image of Santa Clause on top. When families gather, the children will collect these gloss images and play with them.
Another place you can always find honninghjerter is at Christmas markets. They are easy to nibble on while you wander the stalls and look at all the Christmas goods.
Like with most Danish Christmas cookies and treats, Danes have honninghjerter with a hot beverage like coffee, tea or glögg.
The History of Honninghjerter
Honey cakes can be traced back at least to the medieval peberkager. You can read more about the history of peberkager in the recipe for Danish Pebernødder.
Honey cakes first came to Denmark through Germany. Monks in Nürnberg baked lebkuchen in the 13th century and by the 17th century, it had become a regular industry.
Honninghjerter as such stems from Southern Jutland in Denmark and are closely linked with the brethren congregation.
We can identify not only the town Danish honninghjerter originated in, Christiansfeldt, a free town for the brethren congregation, but also the address, Lindegade 21, where they were first made in 1783.
Here, a baker named Christian Rasch had opened a bakery. But the business was going poorly, as Rasch couldn’t get his hands on enough honey.
It wasn’t until a German brethren wig-maker from Neudietendorf, named Immanuel Martin Achtnicht, moved to Christiansfeldt that the business took off.
Achtnicht realised that wigs were going out of fashion and began to bake honey cakes instead. He took over Rasch’s bakery, moved it to Lindegade 27 and then in 1797 to Lindegade 36, where it is still located and fully operational today.
The honninghjerter spread quickly to the rest of the country from Christiansfeld, which for a long time held a monopoly on the recipe.
They were very popular because they could keep for a long time in an airtight container without going dry or stale. This made honninghjerter an easy option to keep on hand for fancy company.
Honninghjerter has had a romantic significance as well. They were part of an engagement ritual while arranged marriages were still the norm.
The pastor had to approve of the arrangement and he did so by breaking a honninghjerte in half and observing as the bride and groom to be each ate one half.
The ingredients have changed some over the years as wheat flour replaced rye, the candied citrus peel once ever-present in baked goods went mostly out of fashion and so on.
Some things never changed though, the good quality honey and the long curing time which form the basis of every delicious honninghjerte recipe.
Speciality Techniques, Ingredients & Equipment
It takes a while to make great honninghjerter and there’s no speeding up the process. The pre-dough needs to rest in a cold place for at least a month (more time just makes it better).
During this time the flour is infused by the honey and the taste is developed. It’s also this period which creates the right conditions for juicy and soft honninghjerter.
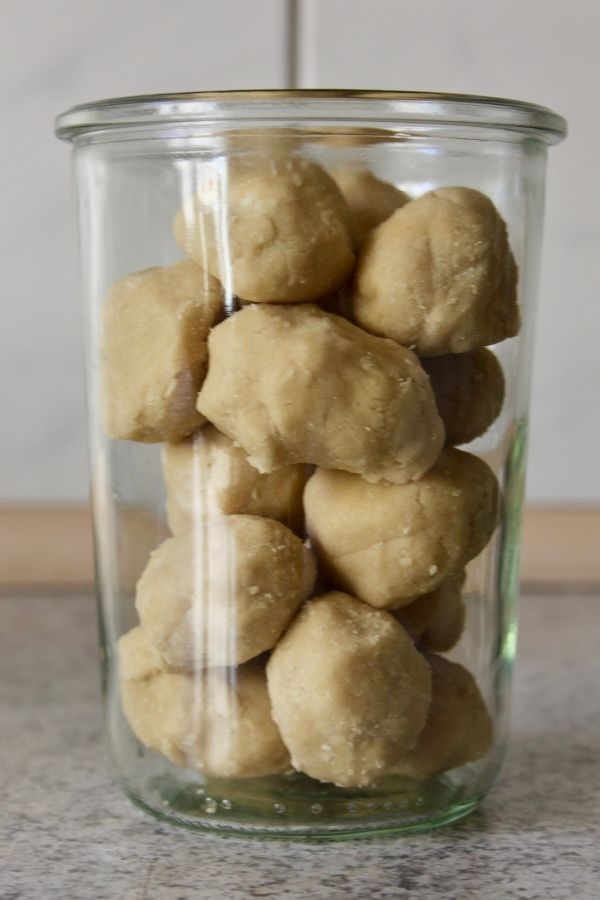
The dough can get quite hard during this time, rock hard actually. It’s not an issue as long as you can get it out of the container you’ve stored it in. The potash will help soften the dough as you work it again.
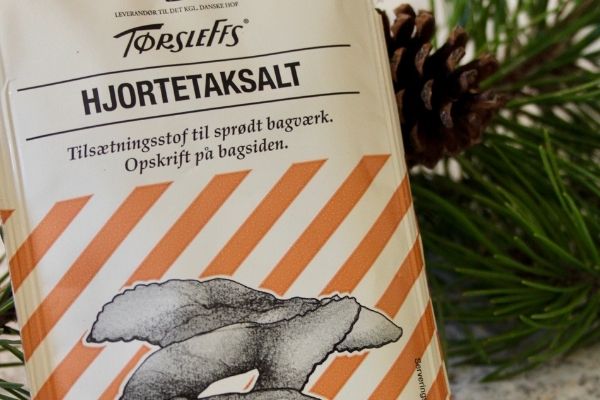
Hartshorn salt
Hartshorn salt is a Danish speciality baking ingredient known under many names including baker’s ammonia and baker’s salt. Its chemical formula is (NH4)2CO3.
Hartshorn salt is used as a leavening agent and helps give honninghjerter a light texture.
In most recipes, 1 tsp hartshorn salt can be replaced by 1 tsp baking soda and 1 tsp baking powder. With this particular recipe, I would hesitate to do so. But if you really can’t find hartshorn salt, then do give it a try.
Potash
Potash is another Danish speciality baking ingredient. Its chemical formula is KHCO3.
As previously mentioned, potash helps to soften the dough after it has been resting for at least a month in a cold place. It adds to the light texture and brings a subtle bitterness.
You can generally substitute potash with equal amounts of baking soda but it does change the flavour profile. In some recipes, this is not a big deal but for honninghjerter, I really do recommend using potash if you can find it.
Cookie cutters
The easiest way to shape honninghjerter is by using heart-shaped cookie cutters. If you don’t have any, you can freehand hearts with a knife or cut out a template in baking paper or cardboard and cut after it with a knife.
You don’t have to make hearts, you can use any shape you like or simply cut snitter (like the shape used for honingsnitter explained in the next section, Variations in Denmark)
Variations in Denmark
Filling or no filling?
A honninghjerte bought in most bakeries today does not come with any filling. Instead, they are almost always glazed and decorated with a glossy image.
Making honninghjerter with a filling oversteps the borders between honninghjerter and honningsnitter.
I have always made honninghjerter with and without a filling, as I like both kinds. Besides, the filling used in honningsnitter (see below), my two favourite quick options are orange jam or apricot jam.
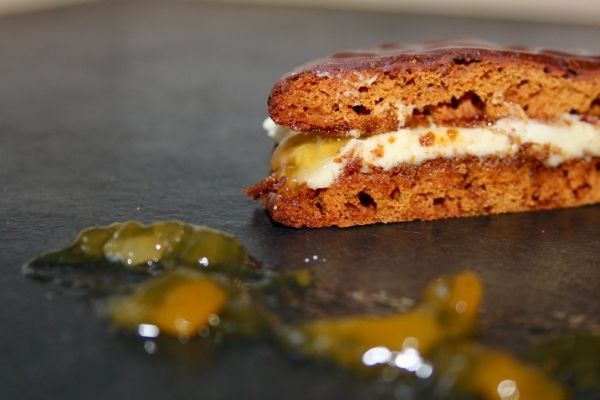
If you want to fill your honninghjerter simply cut them in half, spread your desired filling on the bottom half. Add the top half, cover in your desired glazing, let dry and enjoy.
Ginger
Some like to add 0.2 oz (5 g) ground ginger to the dough. If you are generally a fan of ginger, you will love it in honninghjerter.
Glazing
The traditional glazing for honninghjerter is a powdered sugar glazing with red food colouring added to give a pink colour.
A more decadent and delicious “glazing” is made by covering the honninghjerter in melted dark chocolate. You want it very dark, 85% is perfect. I personally think this glazing goes really well with the fillings mentioned earlier.
Honningsnitter (Honey Slices)
Honningsnitter are made much the same way as honninghjerter. The only differences are the shapes and filling.
Honningsnitter are made in long strips that are cut up into snitter (slices) just prior to serving them.
The filling is mouth-watering good. You fill them with a homemade apple compote and buttercream. Slice a strip in half, add the apple compote on the bottom and the buttercream on top, combine and coat in melted dark chocolate.
To make the apple compote:
Use 17.6 oz (500 g) apples, peeled and pitted. Boil them on low heat with 250g sugar until tender. Add some apple cider vinegar to taste.
This makes more compote than you need but it will keep in the fridge for 1 month.
To make the buttercream:
Use equal amounts of butter and powdered sugar and cream it using a hand mixer (or a whisk if you’re hardcore). Make only as much as you need as it goes bad quickly.
Honninghjerter in Other Countries
In Sweden, the German lebkuchen turned into thin, crips pepper cakes, pepparkaker instead of the fat and small Danish honninghjerter.
Honninghjerter Ingredients
Flour – Don’t use self-rising flour. Use an all-purpose or pastry flour for the best result.
Honey – Make sure you are using real, unadulterated honey. You don’t want anything that’s mixed with sugar or water. If you can buy raw honey straight from a beekeeper, this is your best option.
Potash – Helps soften the dough and give it a light texture. You may be able to substitute with equal amounts of baking soda but it will change the taste.
Eggs – Use as fresh eggs as possible and get the best quality you can afford.
Cinnamon – Use Ceylon cinnamon for the best result. Avoid Cassia cinnamon.
Cloves – Freshly ground is best. If you can’t grind your own, use a freshly opened bag.
Hartshorn salt – Acts as a leavening agent and results in a light and fluffy texture. You can attempt substituting 1 tsp hartshorn salt with 1 tsp baking soda and 1 tsp baking powder, but the result will not be quite the same.
How to Make Honninghjerter
It takes a long time to make honninghjerter. At least five weeks. But the actual effort you put in during that time is limited.
Pre-dough
First, at least five weeks before you want to eat the honninghjerter, you’ll need to make the pre-dough. This only consists of two ingredients, honey and flour.
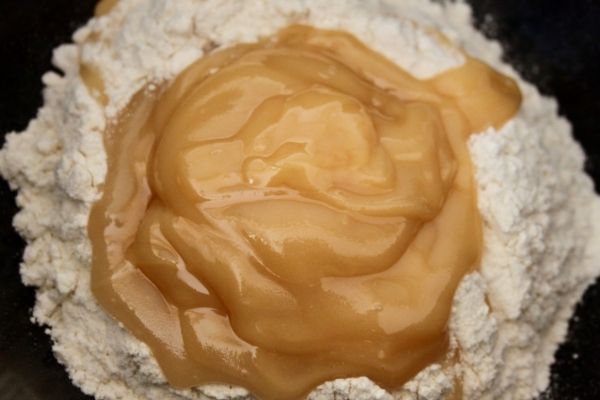
Mix the honey and flour until fully combined. You’ll get to a stage where it’s all crumbly and it will look like it will never turn into a proper dough but don’t lose faith.
Keep kneading until you can form a big ball out of the dough. For storage purposes, you may want to make a number of smaller balls.
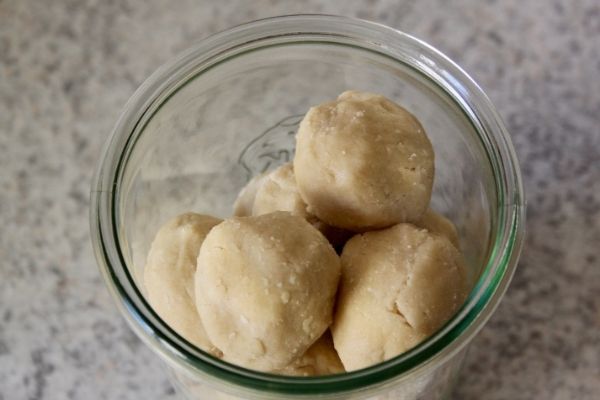
Add the dough to an airtight container and let it rest in a cold place, like your fridge, for at least four weeks. The longer the better. I know people who rest their pre-dough for more than six months.
Adding the Remaining Ingredients
This step should be done 3-4 days before you want to eat your delicious homemade honninghjerter. You can’t, I repeat, you absolutely can’t do this on the day you want to eat them. They will not be edible!
In a bowl, combine the egg yolks with the potash. Stir until you are sure there aren’t any clumps left.
Add the egg yolk mixture to the pre-dough. At this point, you also want to add the cinnamon, cloves, hartshorn salt and ginger if you like it.
Now begins the kneading. This can seem like an impossible mission if your pre-dough has gone rock hard. The potash will help you soften the dough so take heart and carry on.
If you are kneading the dough by hand, you should count on spending about 8 min doing so.
You can also use a kitchen machine. This makes your life a lot easier. Give the dough 3 min on a low setting and 3 min on the highest possible setting.
Once the dough is fully combined, soft and workable, it’s time to roll it out.
Roll it into a thickness of roughly ⅛ inch (4 mm). Cut out hearts with a cookie cutter or a knife.
Place the hearts on baking trays and bake for 8-10 min at 350F (180C).
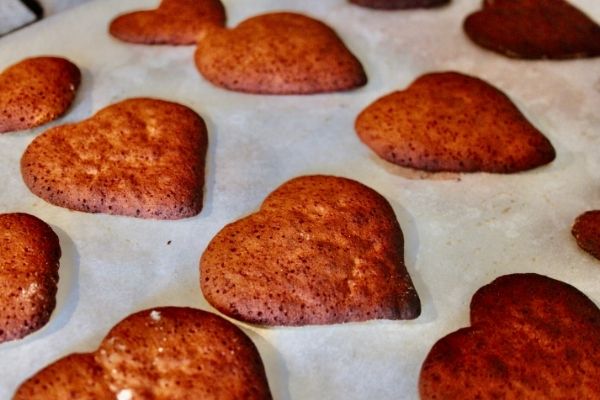
Let the honninghjerter cool completely on a wire rack. Once fully cooled the honninghjerter should be rock hard. That’s why you can’t eat them today.
Place the honninghjerter in a container and cover them with a moist kitchen towel. Place them in the fridge for 3-4 days.
The honninghjerter will absorb the moisture and become wonderfully soft.
On Serving Day
The day you have waited on for at least five weeks is here, it’s finally time to taste the honninghjerter.
Make sure you only take out as many hearts as you plan on eating. The hearts will store well in the fridge for at least 1 month, so you can take your time eating them all.
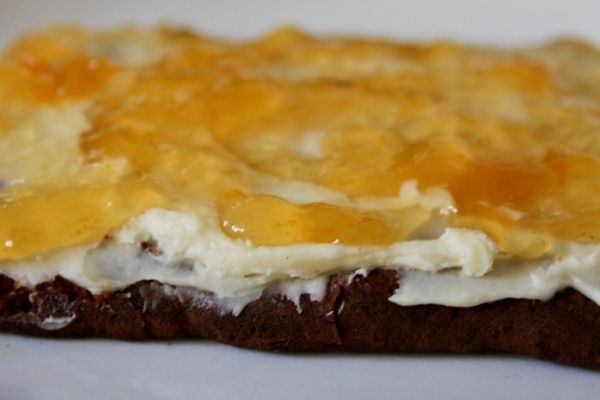
If you want a filling, now is the time to add it. Slice the hearts in half, add your desired filling to one half and combine the halves again.
Add your desired glazing. If you are using melted chocolate, you can melt it in a bain-marie by placing a glass bowl in a pot of simmering water. Only cover the hearts you plan to eat.
Let the glazing dry. It’s finally time, take a deep breath and a big bite – enjoy!
Danish Honninghjerter (Honey Heart Cookies)
Ingredients
Pre-dough, made at least 5 weeks before you want to eat them:
- 500 g flour
- 500 g honey
Remaining ingredients, added 3-4 days before you want to eat them:
- 0.4 oz 10 g Potash
- 2 egg yolks
- 0.2 oz 5 g cinnamon
- 0.2 oz 5 g crushed cloves
- 1.5 tsp hartshorn salt
Instructions
Honey/Flour Pre-Dough
- Mix flour and honey until fully combined.
- Place in a container with a lid. Make sure you will be able to get the dough out again as it can go rock hard while it sits. One way to aid this is by forming smaller balls of dough instead of one big ball.
- Hurry up and wait. Let the pre-dough rest for at least 1 month in a cold place before moving on to the next step.
Remaining Ingredients:
- Combine the egg yolks with the potash, make sure there are no clumps left.
- Add the egg yolks to the pre-dough, as well as the remaining ingredients: cinnamon, cloves and hartshorn salt.
- Knead the dough. This takes time. Count on using about 8 min if you do it by hand or 6 if you are using a kitchen machine (do 3 min on a low setting and then 3 on the highest possible setting).
- Roll out the dough to a thickness of roughly ⅛ inch (4 mm). Cut out heart shapes. Continue until all the dough has been made into shapes.
- Place the shapes on a baking tray and bake them for 8-10 min at 356 F (180 C). Carefully test if the honninghjerter are done by feeling them. If they collapse then they aren’t ready yet.
- Fully cool the shapes on a wire rack.
- Your honninghjerter should now be rock solid. Place the honninghjerter in a container and cover them with a moist kitchen towel. Place them in the fridge for 3-4 days.
Serving Honninghjerter
- Only take out as many honninghjerter as you plan to eat. Honninghjerter will keep at least for a month in the fridge if you leave them in the container until you want to serve them.
- Add a filling if you want to.
- Cover with your desired glazing and let dry.
- Enjoy the honninghjerter at long last.
Notes
Danish Christmas Recipes
Looking for more Traditional Danish Holiday Recipes?
- Danish Klejner
- Danish Havregrynskugler
- Danish Luciaboller
- Danish Jodekager
- Danish Peppernodder
- Danish Aebleskiver
- Danish Butter Cookies (Vaniljekranse)
Further Reading on Honninghjerter
https://honningkager.dk/honningkagernes-historie/
https://nordmus.dk/honningkager-fra-christiansfeld/
https://denstoredanske.lex.dk/honningkage
1 Comment