This post may contain affiliate links. Please see our disclosure policy.
Same-day sourdough pizza crust has the chewy middle and crisp, golden edges of a sourdough pizza, without the overnight wait. Mix the dough after lunch, and you’ll have homemade sourdough pizza on the table for dinner.

Table of Contents
- Notes from My Kitchen
- How Same-Day Sourdough Pizza Dough Works
- Ingredients for Same-Day Sourdough Pizza Crust
- Yield Notes
- Getting Your Starter Ready
- How to Make Same-Day Sourdough Pizza Crust
- Tips for the Best Sourdough Pizza Crust
- Making Sourdough Pizza Dough Ahead
- How to Freeze Sourdough Pizza Crust
- Serving Sourdough Pizza
- Same-Day Sourdough Pizza Crust FAQs
- More Sourdough Recipes
- Sourdough Pizza Crust (Same Day Recipe)
- Homemade Pesto Recipes
Most sourdough pizza recipes start a day or two ahead. That long, slow rise builds flavor, but it doesn’t help much when you decide at breakfast that tonight is pizza night.
This dough rises in a single afternoon. You still get the chew and the light tang of sourdough. Stretch it thin for a crisp crust, or keep it a little thicker for a softer, breadier slice.
I adapted this recipe from The Sourdough Whisperer by Elaine Boddy. Elaine teaches home bakers all over the world through foodbod Sourdough, and her whole approach is to keep sourdough simple enough to fit into a busy day.
She also wrote Whole Grain Sourdough at Home, and my sourdough Pullman loaf comes from another of her books.
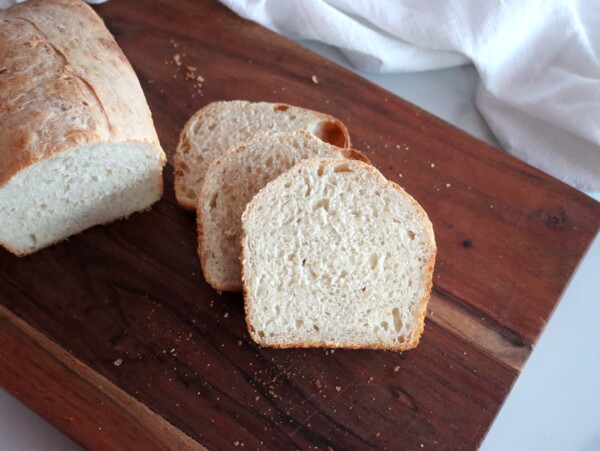
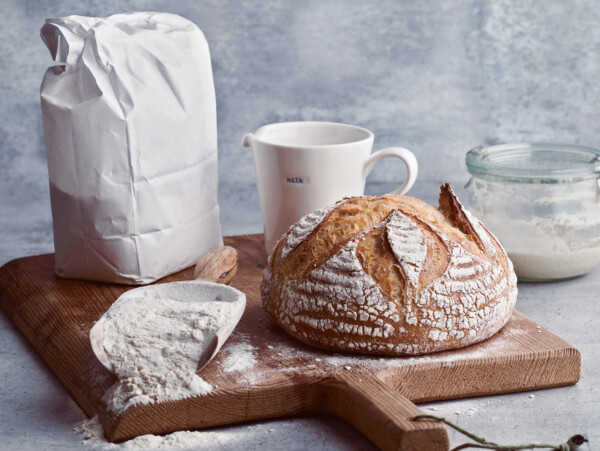
If you don’t have a starter yet, my whole wheat sourdough starter gets one going from scratch. Once it’s bubbling along, there are more than 100 sourdough recipes to put it to work, including sandwich loaves, cakes and cookies. Closer to home, try my soft sourdough bread or sourdough bread with roasted garlic and rosemary.
Notes from My Kitchen

My kids love sourdough with a really mild flavor, and a same-day dough like this one is much milder than an overnight dough. A short, warm rise keeps the tang gentle, without the sharp sour flavor that builds over a long ferment.
When I want more tang, I give the dough more time. A longer rise gives my sourdough loaf bread a much more developed flavor, and pizza dough works the same way. So you can have it mild today, or let it wait in the fridge and make it tangier a day or two later.

How Same-Day Sourdough Pizza Dough Works
A traditional sourdough pizza dough rises long and cool, often overnight in the fridge. The wild yeast takes its time, and the bacteria in the starter build up sour flavor as it goes.
This dough speeds that up in two ways. It uses a generous amount of starter, so there’s plenty of yeast working from the start. It also rises somewhere warm, around 75 to 80°F, and warm water gets it there quickly.
Instead of kneading, you give the dough three quick sets of pulls and folds in the first 90 minutes. That builds enough strength to hold the gas, so the crust bakes up open and chewy. Then the dough rises on its own until it doubles.
The tradeoff is flavor. A quick sourdough pizza dough like this one is milder than one that rested overnight, and plenty of people like it better that way.
Ingredients for Same-Day Sourdough Pizza Crust
Here’s what to know about the flour and the starter. Bread flour gives a chewier crust, but all-purpose flour works too, and any healthy starter will do, white or whole grain.
The dough itself is just four ingredients.
- Active sourdough starter: Use your starter at its peak, when it’s bubbly and has risen well after a feeding. It’s the only thing raising this dough, so it needs to be lively. A white flour starter, a whole wheat starter or a rye sourdough starter all work.
- Bread flour: The extra protein in bread flour makes a stronger dough that stretches thin without tearing and bakes up chewy. All-purpose flour makes a softer, more tender crust, and the dough feels a little slacker.
- Warm water: Water around 100°F warms the dough, so it rises in an afternoon. Plain tap water is fine.
- Salt: Fine sea salt or table salt seasons the crust and tightens the dough. If you measure by volume, use a fine salt, since a spoonful of coarse kosher salt weighs less, and Diamond Crystal weighs about half as much.
You’ll also need something for the pan and something for the top.
- Rice flour or semolina: A dusting on the pan keeps the dough from sticking. Rice flour doesn’t soak into the dough the way wheat flour does, and semolina adds a little crunch to the bottom of the crust.
- Toppings: A thin layer of sauce, cheese and whatever else you like. Go easy on wet toppings, which can keep the middle of the crust soft.
Yield Notes
One batch makes about 1 1/4 pounds of dough, enough for two 10-inch pizzas. Cut each one into 8 slices, and you have 16. For a thicker crust, stretch the dough into two smaller rounds instead.
This dough is much easier to get right when you weigh the ingredients on a digital scale. A scooped cup of flour can weigh far more than a spooned one, and that’s enough to turn the dough stiff and dry.
If you measure by volume, spoon the flour into the cup and level it off. The water is 200 grams, which is 3/4 cup plus 1 1/2 tablespoons, or a scant 7/8 cup.
I often double my sourdough recipes and make two batches at a time for my family, and this one doubles easily. Just use a bigger bowl.
Getting Your Starter Ready
When this dough won’t rise, the starter is usually why. It needs to be active and at its peak when you mix the dough, not sluggish from the fridge.
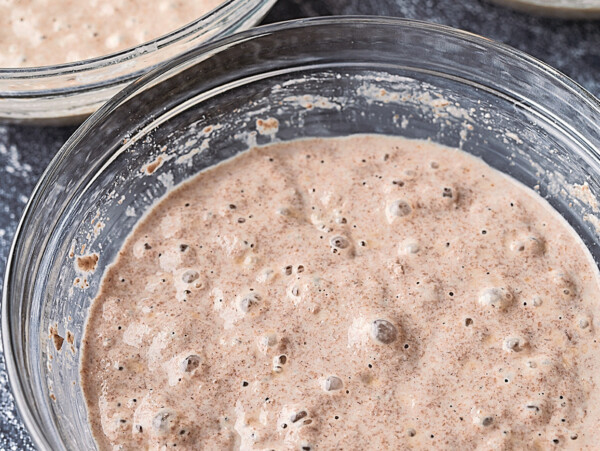
Feed your starter 4 to 12 hours before you plan to mix, depending on how warm your kitchen is. It’s ready when it has risen well, has a domed top full of bubbles, and smells pleasantly sour and yeasty.
If your starter has been in the fridge for a while, give it a feeding or two at room temperature first, until it’s rising reliably again.
Turned out great! I am only a few weeks into my sourdough journey, and I rarely like new recipes I try, but this was definitely a winner.
How to Make Same-Day Sourdough Pizza Crust
Plan on about 5 hours from mixing to eating, nearly all of it hands-off. The work is a quick mix, three short sets of folds, and then stretching and topping the crusts.
Keep the dough somewhere warm the whole time, around 75 to 80°F. An oven with just the light on works in a cool house, and so does the top of the fridge. In a cooler kitchen, every stage takes longer, so watch the dough more than the clock.
Mix the Dough
In a large mixing bowl, stir the starter into the warm water until it’s mostly dissolved. Add the flour and salt, and mix until there’s no dry flour left. A Danish dough whisk makes quick work of it, or just use your hand.
It’ll be a rough, shaggy, sticky dough at this point, and that’s how it should look. Cover the bowl with a damp towel, set it in your warm spot, and let it rest for 30 minutes.
Do Three Sets of Pulls and Folds
After 30 minutes, wet your hand and grab the edge of the dough. Pull it up until it stretches, then fold it over the middle. Turn the bowl a little and repeat, working your way around until the dough tightens into a ball.
Cover it again and let it rest for another 30 minutes, then do a second set. Thirty minutes after that, do a third. With each set, the dough gets smoother, stronger and less sticky.
Keep your hand wet instead of adding flour. If the dough is still soupy after the last set and won’t hold any shape, work in a spoonful or two of flour. That usually means there wasn’t quite enough flour.
Let the Dough Rise
After the last set of folds, cover the bowl and leave the dough in its warm spot until it doubles in size, about 2 1/2 to 3 hours.
It’s ready when it’s domed, has bubbles on top and around the sides of the bowl, and jiggles when you shake the bowl. In a cooler kitchen, this can take a few hours longer, so go by how the dough looks.
Divide and Shape the Crusts
Start heating the oven to 450°F (230°C), or 425°F (220°C) for convection, so it’s hot when the crusts are ready. Dust two rimmed baking sheets with rice flour or semolina. Turn the dough out onto a lightly floured counter, and use a bench scraper to cut it in half.
Shape each half into a loose ball and let them rest for 10 minutes. The short rest relaxes the dough, so it stretches without springing back.
Set a ball on each pan and press it out with your fingertips, working from the middle out. Stretch it to about 10 inches across, or a little wider for a thinner crust, and stop sooner for a thicker one. If the dough keeps shrinking back, let it rest for 5 to 10 minutes and stretch it again.
Top and Bake
Spread a thin layer of sauce over each crust, then add the cheese and toppings.
Bake for 12 to 15 minutes, until the edges are deep golden, the bottom is browned and crisp, and the cheese is bubbling. If you bake both pans at once, swap them between racks halfway through, so they brown evenly.
You can also skip the preheat and start the pizzas in a cold oven. Slide them in, turn the oven on, and bake for about 15 to 18 minutes. Elaine starts a lot of her sourdough baking in a cold oven, and it saves waiting for the oven to heat.
Either way, check the bottom of the crust before you pull it out. If it’s still pale, give it a few more minutes.
Tips for the Best Sourdough Pizza Crust
Bake on a lower rack for a crisper bottom. A pan on the lower rack sits closer to the heat, so the bottom of the crust browns before the toppings overcook.
Parbake for heavy toppings. If you like lots of toppings, or wet ones like fresh tomatoes, bake the plain crust for about 5 minutes first, then top it and finish baking. The crust sets before the toppings go on, so it stays crisp under them.
Pat fresh mozzarella dry. Fresh mozzarella holds a lot of water. Slice it, press the slices between paper towels for a few minutes, and the middle of the pizza won’t go soggy.
Making Sourdough Pizza Dough Ahead
You don’t have to bake this dough the day you make it. After the rise, divide it, shape it into balls, and rub each one with a little olive oil. Put them in covered containers and refrigerate them for up to 2 days.
The cold slows everything down, and the dough picks up more sourdough tang the longer it sits. I don’t keep sourdough waiting longer than 2 days, though, since the gluten starts to break down as it gets more acidic.
Take the dough out of the fridge 1 to 2 hours before you plan to bake. Cold dough tears and shrinks back when you stretch it, so let it warm up and relax first.
How to Freeze Sourdough Pizza Crust
To freeze the crusts, parbake them first. Bake the plain crusts until the dough is set but not browned, about 5 to 10 minutes in a hot oven, or 10 to 15 minutes from a cold start, depending on how thick they are.
Let them cool completely, wrap them well, and freeze them for up to about a month. When you’re ready, top them straight from the freezer and bake as usual, adding a few extra minutes.
You can freeze the raw dough too. Freeze the oiled dough balls after the rise, in a freezer bag, for up to about a month. Thaw them overnight in the fridge, then let them sit on the counter for 2 to 3 hours before stretching.
Sourdough can be slow to wake up after a trip to the freezer, so I’d parbake if you can. The parbaked crusts come out of the freezer ready to top, with no waiting on the dough.
Serving Sourdough Pizza
A simple tomato sauce and mozzarella are all this crust needs. For the sauce, try a jar of roasted marinara sauce or roasted cherry tomato sauce. For the cheese, homemade cultured mozzarella melts beautifully.
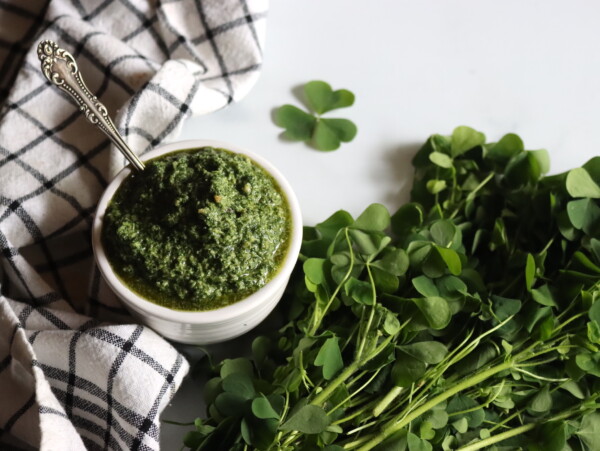
Pesto makes a nice change from tomato sauce. Spread on garlic scape pesto, wild ramp pesto or wood sorrel pesto, then top it with cheese.
In summer, top it with sliced cherry tomatoes and fresh basil, and look for more ideas in my list of cherry tomato recipes.

A crisp green salad on the side makes it a meal.
Leftover pizza keeps in the fridge for 3 to 4 days. Reheat the slices in a hot skillet or in the oven instead of the microwave, so the crust crisps back up.
Same-Day Sourdough Pizza Crust FAQs
Freezing is the question readers ask most, so that answer is here, along with what to do when the dough won’t rise.
Usually the starter wasn’t active enough, or the dough was too cool. Use your starter at its peak, 4 to 12 hours after a feeding, and keep the dough around 75 to 80°F. In a cooler kitchen, it can take a few hours longer to double.
Most often it’s the measuring, since flour measured by the cup varies a lot, so weigh it if you can. All-purpose flour also makes a stickier dough than bread flour. A sticky dough firms up as you fold it, so keep your hand wet and give it all three sets of folds before you add any flour.
Not for this recipe. The starter is the only thing raising the dough, so it needs to be active and bubbly. Unfed discard won’t give it enough lift in one afternoon, so save it for sourdough discard crackers instead.
Yes. Parbake the crusts until the dough is set, then cool, wrap and freeze them for up to about a month. You can freeze the raw dough balls after the rise too, though sourdough can be slow to wake up after freezing. Thaw them overnight in the fridge, and give them 2 to 3 hours on the counter before stretching.
Yes. After the rise, shape it into balls, oil them lightly and refrigerate them for up to 2 days. Take them out 1 to 2 hours before stretching. The longer the dough waits, the tangier the crust.
More Sourdough Recipes
More sourdough recipes for everyday baking.
If you tried this Sourdough Pizza Crust recipe, or any other recipe on Adamant Kitchen, leave a ⭐ star rating and let me know what you think in the 📝 comments below!
And make sure you stay in touch with me by following on social media!

Sourdough Pizza Crust (Same Day Recipe)
Equipment
- Mixing Bowls
- Rimmed Baking Sheet
Ingredients
- 1/4 cup sourdough starter, active and bubbly
- 7/8 cup water, scant, warm
- 2 1/2 cups bread flour, spooned and leveled, plus more for dusting
- 1 tsp fine sea salt or table salt
- rice flour or semolina, for dusting
- toppings, such as tomato sauce and mozzarella
Instructions
- Stir the starter into the warm water in a large bowl. Add the flour and salt, and mix until there’s no dry flour left. Cover with a damp towel and let it rest in a warm spot, about 75 to 80°F, for 30 minutes.
- With a wet hand, do a set of pulls and folds: stretch one edge of the dough up and fold it over the middle, turn the bowl, and repeat until the dough tightens into a ball. Cover and let it rest for 30 minutes.
- Do a second set of pulls and folds, cover, and let it rest for 30 minutes. Then do a third set.
- Cover the bowl and let the dough rise in the warm spot until it doubles and looks domed and bubbly, about 2 1/2 to 3 hours, or longer in a cooler kitchen.
- Heat the oven to 450°F (230°C), or 425°F (220°C) for convection. Dust two rimmed baking sheets with rice flour or semolina. Turn the dough onto a lightly floured counter, cut it in half, shape two loose balls, and let them rest for 10 minutes.
- Press each ball out on a baking sheet with your fingertips, to about 10 inches across, a little wider for a thinner crust or smaller for a thicker one.
- Spread the crusts with sauce, then add the cheese and toppings.
- Bake for 12 to 15 minutes, until the edges are deep golden, the bottom is crisp and the cheese bubbles, swapping the pans halfway if you bake both at once. If you skip the preheat and start them in a cold oven, bake for about 15 to 18 minutes.
Notes
Nutrition
Nutrition information is automatically calculated, so should only be used as an approximation.
Homemade Pesto Recipes
Spread one on the crust in place of tomato sauce.


Find the perfect recipe
Searching for something else? Enter keywords to find the perfect recipe!
Adapted with permission from The Sourdough Whisperer by Elaine Boddy. Page Street Publishing Co. 2022. Photos from the book, used with permission.


Dough works up so easily, quick, nice rise about 6 hours in my house.
Crispy crust….delicious!
This recipe is a keeper!!!
I’m so glad you like it!
I don’t have time to pre-bake the dough. Will it be ok to just freeze, what’s the best way to store them?
Yes, you can freeze the dough unbaked. Freeze the dough balls after the bulk rise, once you’ve divided them, with a light coat of olive oil, wrapped tight or in a freezer bag, and use them within about a month. Thaw them overnight in the fridge, then give them 2 to 3 hours on the counter before you stretch them, since sourdough can be a little sluggish after freezing.
This will be my go to for pizza night.
I’m so glad you like it!
Can I freeze this pizza dough ?
Yes, definitely. It’ll stay good in the freezer for about a month, but after that pizza dough can degrade in quality a bit.
Should I bake first then freeze or not bake and freeze?
You should bake first, just until the dough is set, then freeze. Sourdough cultures don’t survive well in the freezer (unlike regular yeast, which doesn’t mind). Baking them until the dough is cooked, but not pizza crisp, is the best way to freeze this dough.
I ended up needing just a bit more flour than called for because my dough was SUPER sticky after the last round of stretch and folds still. I ended up doing just a little bit of kneading to get it all incorporated but still got great texture in the final crusts. Used a proofing box to keep the temps nice and warm. We found that the dough needed a bit of extra time to bake and the toppings were getting a bit done. We may try par baking them for a few minutes to get them started before we top them next time. The end result was crispy and chewy at the same time which is a very good thing.
Crispy and chewy at the same time is just what you want in a pizza crust! For the toppings, the parbaking steps near the end of the post will get the base started before they go on. Enjoy!
Turned out great! I am only a few weeks into my sourdough journey, and I rarely like new recipes I try, but this was definitely a winner. The only modification I made was a few minutes of extra cook time for extra crispiness!
My husband has been making this dough for pizza night and it is wonderful!
Wonderful! So glad you’re enjoying it!