This post may contain affiliate links. Please see our disclosure policy.
Bread machine problems can be frustrating, but there’s often a simple solution to get it right. If your loaf is collapsing, too dense, or underbaked, there may be a simple way to troubleshoot the issue and get it right every time.
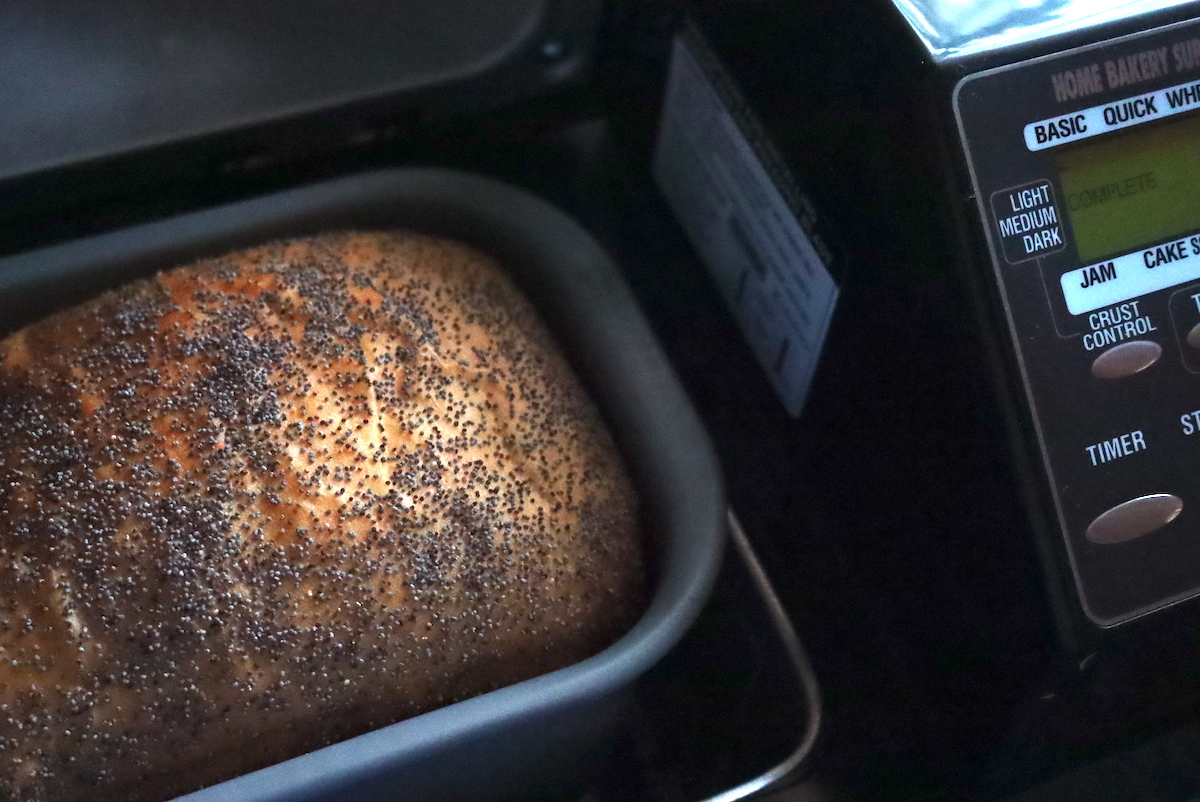
Table of Contents
- Common Bread Machine Issues
- Top Inflated, Mushroom-like Shape
- Collapsed Loaf
- Center of Loaf Raw, Not Baked
- Gummy Texture
- Flat Loaf, No Rising
- Short Loaf Volume
- Bread Doesn’t Slice Well, Sticky
- Open, Coarse, Holey Texture
- Bread Cracks on the Side
- Heavy, Dense Texture
- Burned Loaf, Thick Crust, or Dark Crust Color
- Bread Sticks to Pan
- Tested Bread Machine Recipes
Bread machines are a convenient way to make bread at home, and they’re perfect for beginners…but that doesn’t mean they make flawless bread every time.
Bread machines aren’t perfect, and neither are people. Incorrect measurements, yeast issues, or machine malfunctions can sometimes cause problems that can leave you scratching your head (and maybe even tossing a failed loaf).
Whether you’re dealing with a loaf that won’t rise or a crust that’s too dark, this troubleshooting guide will help you to both find your problem and learn how to fix it.
Common Bread Machine Issues
Before I go through each of the most common issues you may face with your bread machine, these general tips apply to many of the issues listed below:
- Yeast Issues: Ensure your yeast is fresh. If you’re using expired yeast, it may not activate properly, leading to poor rise or texture. If you’re using a timer, be sure the yeast isn’t exposed to moisture before the machine starts. You can prevent this by placing dry ingredients around the yeast in the pan.
- Dough Consistency: During the kneading phase, check the consistency of the dough. It should form a soft, slightly tacky ball. If it’s too dry, add water 1 tablespoon at a time; if it’s too wet, add flour a little at a time.
- Reduced Salt: I know it may seem like salt is just there for flavor, but it actually regulates the activity of the yeast and helps set the structure of the loaf. If you want a reduced sodium bread, be sure to use a reduced sodium recipe rather than just omitting the salt.
- Weather Conditions: Warm, humid weather can affect your bread machine’s performance. If you live in a warm or tropical climate, try using cooler liquids, bake during the evening, or use the rapid cycle to reduce the risk of over-proofing.
- High Altitude: If you live at a high altitude, make sure to follow the appropriate adjustments for baking at altitude. This often includes reducing the yeast and liquid slightly and adjusting the baking time.
Now, I’ll go through the most common bread machine problems, one by one.
Top Inflated, Mushroom-like Shape
If your loaf rises up and out like a mushroom cap (or even spills over the pan), the dough is almost always rising too fast and too far for the pan size and cycle you’re using. Bread machines run warm and they’re very efficient at proofing, so a recipe that’s “fine” in a cooler kitchen or in a regular oven can easily over-rise in a closed bread machine.
Sometimes the loaf actually bakes up fine, but you’re left with a dramatic dome that’s awkward to slice. Other times it overflows, hits the lid, and you end up with torn crust, a dense band near the top, or burnt bits stuck to the heating element.
- Too Much Yeast: The most common culprit. Too much yeast (or yeast that’s very active) makes the dough expand quickly, then keep going until it runs out of room. Reduce yeast by ¼ teaspoon the next time. If it still domes aggressively, reduce by another ¼ teaspoon.
- Using Fast-Rise/Bread Machine Yeast in a Regular Recipe: Bread machine and rapid-rise yeasts are designed to work quickly. If a recipe was written for active dry or regular instant yeast, swapping in fast-rise can push it into overproofing territory. Use the yeast type the recipe calls for whenever possible. If the recipe doesn’t specify, regular instant yeast is usually the safest bet for predictable rise.
- Too Much Sugar (or Sweet Dough on the Wrong Cycle): Sugar feeds yeast and speeds fermentation. In lightly sweetened sandwich bread, reducing sugar by 1 teaspoon can calm the rise. In richer sweet breads, use the machine’s sweet bread setting if you have it, or reduce yeast slightly—sweet doughs often need a slower cycle to keep the rise under control.
- Not Enough Salt: Salt regulates yeast activity and helps the dough hold its shape. If salt is missing (or reduced a lot), the dough can rise too quickly and balloon upward. Use the full amount of salt in the recipe. If you’re reducing salt on purpose, reduce the yeast slightly too.
- Warm, Humid Weather (or a Hot Kitchen): Heat makes yeast work faster, and bread machines already create a warm proofing environment. If your kitchen is warm or humid, use cooler liquids, avoid placing the machine near a heat source, and reduce yeast by ¼ teaspoon. You can also reduce liquid by 1 tablespoon to slightly tighten the dough.
- High Altitude: Dough rises faster at altitude, and overproofing is common. Above 3,000 feet, reduce yeast by ¼ to ½ teaspoon and reduce liquid by 1 tablespoon. If you’re well above that, you may need an additional small yeast reduction.
- Recipe Too Large for the Pan (Loaf Size Mismatch): Even a perfectly balanced recipe will overflow if it’s simply too big for your machine. Make sure the recipe matches your bread machine’s loaf size setting (1 lb, 1½ lb, 2 lb). If you’re consistently getting overflow or extreme doming, switch to a smaller loaf setting or scale the recipe down.
If you want the quickest “in the moment” clue, check the dough during kneading: a dough that’s overly soft and loose often rises faster and higher than expected. A smooth, slightly tacky dough ball tends to rise more predictably and bake into a more evenly shaped loaf.
Collapsed Loaf
A collapsed or sunken loaf is almost always a sign that the bread rose too much, too fast, or too weakly, and then the structure couldn’t support itself once the machine switched to baking (or as the loaf cooled). Sometimes you’ll see it fall during the bake, and other times it looks fine when you open the lid, but sinks as it cools and the steam inside escapes.
The good news is that most collapsed loaves are easy to prevent once you identify whether the problem is too much rise or not enough structure.
- Too Much Dough for the Pan: If the recipe makes more dough than your pan can support, the loaf can over-rise and then collapse under its own weight. Make sure the recipe matches your machine’s loaf size setting (1 lb, 1½ lb, or 2 lb), and don’t exceed your bread pan’s recommended capacity.
- Incorrect Dough Consistency (Most Common): Dough that’s too wet rises quickly but doesn’t have enough strength to hold that rise, so it caves in. Dough that’s too dry can struggle to rise evenly and may collapse after baking because the crumb is weak and irregular. During kneading, the dough should form a smooth, soft ball that’s slightly tacky. If it’s smearing on the sides or looks loose and glossy, add flour 1 tablespoon at a time. If it looks tight, rough, or stiff, add water 1 tablespoon at a time.
- Too Much Yeast (or Yeast That’s Too Fast): Excess yeast can make the dough balloon during proofing, then collapse once it hits the heat of baking or as it cools. Reduce yeast by ¼ teaspoon and see if the loaf becomes more stable. Also make sure you’re using the right yeast type—rapid-rise and bread machine yeast can overperform in recipes written for active dry or regular instant yeast.
- Too Much Sugar (Especially in Rich Doughs): Sugar speeds up fermentation and can make the loaf rise quickly and then lose strength before the crumb is set. In savory breads, try reducing sugar by 1 teaspoon. In sweet breads, it’s usually better to reduce yeast by ¼ to ½ teaspoon, and use the machine’s sweet bread cycle if you have it (those cycles are designed to slow the rise and bake more gently).
- Not Enough Salt: Salt regulates yeast activity and strengthens the dough. If salt is missing or reduced too much, the dough often rises too quickly and collapses because the structure never fully develops. Use the full amount of salt in the recipe. If you’re intentionally reducing salt, reduce yeast slightly as well.
- Warm, Humid Weather (or a Warm Kitchen): Bread machines proof in a closed, warm environment, and hot weather pushes yeast even harder. This can lead to overproofing before baking begins, and then collapse. Use cooler or refrigerated liquids, bake during the coolest part of the day, and reduce yeast by ¼ to ½ teaspoon. If the dough looks overly soft, reducing liquid by 1 tablespoon can also help.
- High Altitude: Dough rises faster at altitude and can easily overproof, especially in a bread machine. Above 3,000 feet, reduce yeast by ¼ to ½ teaspoon and reduce liquid by 1 tablespoon. If you’re much higher than that, you may need another small yeast reduction.
If you’re not sure where to start, begin with the easiest, most reliable fix: check the dough during kneading and correct the consistency. A dough that’s just a bit too wet is one of the most common reasons a loaf rises beautifully…and then sinks.
Center of Loaf Raw, Not Baked
Cutting into a loaf and finding a gummy, underbaked center is one of the most discouraging bread machine problems. In most cases, it happens because the loaf is too wet or too large to bake through on that cycle, or because something interrupted the machine’s ability to knead and bake evenly.
- Too Much Liquid (Most Common): If the dough is overly wet, the outside can brown while the center stays dense and undercooked. During kneading, the dough should form a soft, smooth ball that’s slightly tacky, not a loose batter that smears around the pan. If the dough looks wet and sticky, add flour 1 tablespoon at a time. If you’ve made this recipe before and it’s consistently underbaked, reduce the liquid by 1 tablespoon the next time.
- Recipe Too Large or Wrong Cycle for the Dough: A high, heavy loaf (especially whole wheat, seeded, or enriched doughs with milk, eggs, butter, or lots of sugar) may need a longer bake than a basic white bread cycle provides. Make sure you’re using the correct loaf size setting for your machine, and choose an appropriate cycle (whole wheat for whole grain doughs, sweet bread for rich doughs). If your machine has a crust setting, selecting a darker crust option can sometimes add a bit more baking time.
- Power Outage or Cycle Interrupted: If the machine loses power or stops partway through, the loaf may not get the full bake time, leaving the center raw. In most cases, the best fix is to start over with fresh ingredients. If the dough has been sitting warm for a while after an interruption, it can overproof and won’t bake up properly even if you restart.
- Knead Bar Not Inserted Correctly (or Not Turning): If the knead paddle isn’t seated correctly, or if it’s stuck and doesn’t turn, the dough won’t mix and knead properly. That can leave pockets of dry flour and dense, undercooked areas in the center. Before starting, make sure the knead bar is firmly installed. If you notice the machine isn’t kneading normally, stop the cycle and reseat the paddle before continuing.
If this happens often, the quickest diagnostic is to check the dough during kneading. Getting the dough consistency right early prevents a lot of “looks done on the outside, raw in the middle” loaves.
Gummy Texture
A gummy, sticky crumb is one of the most common bread machine complaints. The loaf may look baked and browned on the outside, but the inside feels damp, dense, and slightly “paste-y.” This usually happens when the dough is too wet, the bread is slightly underbaked for that cycle, or the loaf’s structure didn’t develop well enough to bake up light and dry.
- Too Much Liquid (Most Common): A dough that’s even a little too wet can bake up gummy, especially in the center. During kneading, the dough should form a smooth, soft ball that’s slightly tacky—not a loose mass that smears around the pan or sticks heavily to the sides. If it’s too wet, add flour 1 tablespoon at a time during kneading. If the recipe is consistently gummy, reduce the liquid by 1 tablespoon next time.
- Wrong Cycle or Setting for the Dough: Rich doughs (milk, eggs, butter, sugar), very large loaves, and whole grain breads often need a longer, steadier bake than a basic white bread cycle provides. Use the whole wheat cycle for whole grain doughs and the sweet cycle for enriched/sugary doughs if your machine has them. If you only have crust settings, choosing a darker crust option can add a bit more bake time and help dry the crumb.
- Not Enough Baking Time (Especially with Large Loaves): If you’re making a 2 lb loaf on a smaller machine, or using a short/rapid cycle, the crust can brown before the center is fully set. Make sure the loaf size setting matches your recipe, and avoid rapid cycles for high-fat, high-sugar, or whole grain doughs. If your machine allows a “bake only” add-on, an extra short bake can sometimes fix a loaf that’s just barely underdone.
- Slicing Too Soon: Bread can feel gummy simply because it hasn’t finished setting. Steam continues to redistribute as the loaf cools, and slicing early traps that moisture in the crumb and makes it seem underbaked. Let the loaf cool at least 20 to 30 minutes (longer for large loaves) before slicing.
- Too Much Yeast (Overfast Rise): When dough rises too quickly, it can create a weak structure that looks tall at first but bakes up with a dense, slightly gummy interior. Reduce yeast by ¼ teaspoon and see if the crumb improves. If you’re using bread machine or rapid-rise yeast in a recipe not written for it, that can also push the rise too fast.
- Too Little Yeast or Weak Yeast: If the yeast is old or you’re not using enough, the loaf may not rise properly, which often creates a dense crumb that reads as gummy. Check your yeast’s expiration date, store it airtight, and measure carefully. If the loaf is both gummy and noticeably short, yeast strength is a good place to look.
If you want a quick troubleshooting shortcut, this is the one I use: gummy and tall loaf usually means too fast a rise, but a gummy and short loaf usually means not enough rise or too wet a dough.
Flat Loaf, No Rising
If your loaf comes out short, heavy, and flat, the yeast either never activated, was damaged, or ran out of strength before the bread could bake. Bread machines are usually very consistent, so when there’s almost no rise, it’s typically a simple ingredient or timing issue rather than the machine itself.
- Yeast Left Out: It happens more often than you’d think, especially if you pre-measure ingredients. Double-check that yeast actually made it into the pan before you start the cycle.
- Expired or Weak Yeast: Yeast loses strength over time, especially if it’s been stored warm or opened for a long time. Check the expiration date, store yeast airtight (ideally in the refrigerator or freezer), and replace it if you’re getting repeated flat loaves.
- Liquid Too Hot (Kills Yeast): Yeast needs warmth, but hot liquid can kill it instantly. Aim for lukewarm liquid, about 90 to 100°F. If you’re using very hot tap water or heating milk on the stove, it’s easy to overshoot without realizing it.
- Liquid Too Cold (Slow/No Rise on Short Cycles): Very cold liquid won’t kill yeast, but it can delay fermentation enough that the loaf doesn’t rise well, especially on rapid cycles. Use room temperature ingredients unless you’re deliberately trying to slow down rising in very warm weather.
- Too Much Salt (or Salt Touching Yeast Directly): Salt slows yeast, and in excess it can prevent a good rise. Measure carefully. Also avoid pouring salt directly on top of yeast in the pan—keep salt mixed into the flour and place yeast on top of dry ingredients so they’re not in direct contact.
- Forgot to Add Sugar (Only in Recipes That Truly Need It): Most yeast breads don’t need much sugar, but some recipes rely on it (especially sweet breads or recipes written for a quick rise). If the recipe includes sugar, honey, or another sweetener, make sure it’s included as written.
- Yeast Got Wet Before the Cycle Started (Delayed Timer Issue): With a delayed start, yeast can start activating early if it touches liquid, and then it exhausts itself before kneading even begins. To prevent this, add liquids first, then dry ingredients, and make a small “well” in the flour to hold the yeast. Keep yeast dry and separated from the liquid until the machine starts.
If you’re troubleshooting a flat loaf, the fastest way to narrow it down is to think about the yeast’s three main enemies: missing, too old, or overheated. Those account for the vast majority of no-rise bread machine loaves.
Short Loaf Volume
If your loaf bakes through but comes out noticeably smaller than expected, the yeast is working, but the dough didn’t build or hold enough structure to rise to full height. That can be completely normal for certain recipes, but if it’s happening unexpectedly, it usually comes down to hydration, flour strength, or yeast performance.
- Normal for Some Recipes (Especially 1 lb and Whole Wheat): Smaller loaves aren’t always a problem. A 1 lb recipe will look short in a standard-sized pan, and whole wheat breads naturally rise less because the bran in the flour interferes with gluten development. If you’re making a 1 lb loaf on a 2 lb setting, or using a high percentage of whole grains, a shorter loaf is expected.
- Not Enough Liquid (Dough Too Stiff): Dry dough doesn’t expand well. During kneading, the dough should be soft and smooth, forming a slightly tacky ball. If it looks tight, rough, or stiff, add water 1 tablespoon at a time during kneading. If this recipe is consistently short, increase the liquid by 1 tablespoon the next time.
- Wrong Flour (Not Enough Protein): Bread flour has more protein than all-purpose flour, which helps the dough build stronger gluten and trap more gas. If you’re using all-purpose flour and getting short loaves, switch to bread flour for better rise and structure. This is especially important for basic sandwich breads.
- Too Little Yeast or Weak Yeast: Even if the bread rises a bit, yeast that’s old or under-measured can leave you with a loaf that’s baked but undersized. Check the expiration date, store yeast airtight, and measure carefully. If the loaf is consistently short and dense, try increasing yeast slightly (about ¼ teaspoon) or replacing the yeast with a fresh package.
- Incorrect Yeast Type for the Recipe: Yeast types aren’t always interchangeable in bread machine recipes. Active dry yeast may rise more slowly than instant or bread machine yeast, and using the wrong type can affect timing and final volume. Use the type the recipe calls for, and if you need to substitute, choose a cycle that gives the dough enough rise time.
- Sugar Left Out (Only When the Recipe Relies on It): Most yeast breads don’t need much sugar, but some bread machine recipes are written with a small amount to support consistent rise. If the recipe includes sugar, honey, or another sweetener, make sure it’s included as written.
If you want the simplest fix that works for most “short loaf” situations, check the dough during kneading. A slightly-too-dry dough is one of the most common reasons a loaf comes out baked and tasty, but smaller than it should be.
Bread Doesn’t Slice Well, Sticky
If your loaf squishes, tears, or sticks to the knife when you slice it, the bread is usually still too warm inside or you’re using a knife that can’t cut cleanly through the crust and crumb. Bread continues to set as it cools, and slicing too soon traps steam in the crumb, making the texture seem sticky even when the loaf is fully baked.
- Slicing While Too Warm (Most Common): Fresh bread is full of steam. If you cut into it right away, the crumb compresses and clings to the blade, and the slices come out gummy and uneven. Let the loaf cool on a rack until it’s just barely warm, at least 30 minutes for a standard loaf and closer to an hour for large or very soft sandwich loaves. If you’re in a hurry, remove it from the bread machine pan promptly and cool it on a rack so moisture doesn’t collect at the bottom.
- Not Using the Right Knife: A straight-edged knife tends to mash soft bread. A sharp serrated bread knife saws through the crust without compressing the crumb, giving you clean slices. If you’re slicing a very soft loaf (like milk bread), a thin-bladed serrated knife works best.
If the loaf still feels sticky even after cooling completely, that’s usually a sign of a gummy crumb from too much moisture or slightly underbaked bread, but most “won’t slice cleanly” problems are solved just by giving it enough cooling time and using a proper serrated knife.
Open, Coarse, Holey Texture
If your loaf has big, uneven holes (or a tunnel running through the middle), the dough usually rose too quickly or too loosely, so it couldn’t hold lots of small, evenly distributed bubbles. Instead, the gas pockets merged into larger voids before the bread had a chance to set during baking. This is especially common in bread machines because the proofing environment is warm and consistent, which can push dough just a little too far.
- Salt Left Out (or Reduced Too Much): Salt regulates yeast activity and strengthens the gluten structure so the dough can trap gas evenly. Without enough salt, the dough ferments too aggressively and the structure stays weak, which leads to oversized air pockets. Use the full salt amount in the recipe. If you’re intentionally reducing salt, reduce the yeast slightly as well.
- Too Much Yeast (or Yeast That’s Too Fast): Excess yeast creates a rapid rise, which encourages bubbles to grow and merge into larger holes. Measure carefully, and if the crumb is consistently coarse, reduce yeast by ¼ teaspoon. Also check the yeast type—bread machine or rapid-rise yeast can overperform in recipes written for active dry or regular instant yeast, especially on longer cycles.
- Too Much Liquid (Dough Too Wet): Wet dough rises easily, but it doesn’t hold its shape well, so bubbles combine into bigger pockets. During kneading, the dough should form a smooth, soft ball that’s slightly tacky. If it’s smearing on the sides, slumping, or looking more like thick batter than dough, add flour 1 tablespoon at a time until it tightens up.
- Overproofing from Warm Conditions or a Delayed Start: Warm kitchens, warm ingredients, and timer cycles can push dough into overproofing before the bake phase begins. Overproofed dough often looks impressively puffy, but it bakes up with weak structure and big holes. Use cooler liquids, bake during the coolest part of the day, and reduce yeast by ¼ teaspoon if you regularly use the timer.
If you’re not sure what changed, start with the two biggest culprits: check dough consistency during kneading and slow the rise slightly. Most open, holey loaves trace back to dough that’s just a bit too wet or yeast that’s just a bit too enthusiastic.
Bread Cracks on the Side
If your bread machine loaf is splitting or cracking along one side, it’s usually a sign that the dough is expanding faster than the crust can stretch. The outside sets first, then the loaf has one last big push of “oven spring” when the machine switches into the bake phase, and it tears at the weakest point.
Most of the time, side cracks come down to dough consistency, yeast activity, or the way the dough sits in the pan during the final rise.
- Dough Too Dry: A stiff dough doesn’t stretch well, so it’s more likely to split when it expands in the oven. During kneading, the dough should form a smooth, soft ball that’s slightly tacky to the touch. If it looks tight, rough, or is bouncing around the pan like a hard rubber ball, it’s too dry. Add water 1 tablespoon at a time during the kneading cycle until the dough softens and looks smooth.
- Too Much Yeast or Too Fast a Rise: If the dough rises very quickly, it can overexpand in the final rise and then tear during baking. This is especially common with bread machine yeast or rapid-rise yeast, warm kitchen temperatures, or recipes with a lot of sugar. Reduce the yeast by ¼ teaspoon and consider using cooler liquid ingredients. If your machine has a “light crust” setting, that can also help because the crust sets a bit more gently.
- Not Enough Salt: Salt slows yeast activity and helps the dough develop a strong, elastic structure. If the salt is missing or reduced too much, the dough can rise too aggressively and then split as it bakes. Use the full amount of salt in the recipe, or if you’re intentionally reducing it, reduce the yeast slightly as well.
- Surface Drying During the Final Rise: If the dough surface dries out, it forms a “skin” that can’t expand smoothly and is more likely to crack. This can happen if the machine sits near a heat source, a draft, or in a very dry kitchen. Use cooler liquids, avoid placing the machine near a vent or heater, and consider using a lighter crust setting.
- Dough Sitting Lopsided or with a Crease Against the Pan: Sometimes the bread machine finishes kneading with the dough pushed to one side, or with a fold or seam pressed against the wall of the pan. That crease becomes the weak spot, and the loaf splits right there as it rises and bakes. If your machine allows, take a quick look right after the final knead and gently nudge the dough into a centered, smooth mound with damp fingers. This small adjustment can make a surprisingly big difference in how evenly the loaf rises.
If your loaf is cracking and also coming out a bit dense, start by correcting dough consistency during kneading. If it’s cracking and also rising very high, focus on reducing yeast slightly and using cooler liquids to slow the rise.
Heavy, Dense Texture
A heavy, dense loaf usually means the dough didn’t develop enough trapped air before baking. That can happen if the dough is too stiff, the yeast is weak or slowed down, or the dough wasn’t kneaded well enough to build a strong gluten network. Bread machines do the work for you, but they’re still sensitive to small measurement issues—especially flour and liquid.
- Too Much Flour (Dough Too Stiff): This is the most common cause. If the dough is dry and firm, the yeast can’t expand it easily and the loaf bakes up tight and heavy. Measure flour carefully (spoon and level, or weigh it if you can), and check the dough during kneading. It should be a smooth, soft ball that’s slightly tacky. If it looks tight, rough, or is bouncing around the pan, add water 1 tablespoon at a time until it softens.
- Not Enough Liquid: Even if your flour measurement is correct, flour absorbs moisture differently depending on brand, humidity, and storage. If the dough seems stiff, increase liquid 1 tablespoon at a time during kneading. A small adjustment is often enough to turn a dense loaf into a lighter one.
- Yeast Issues (Too Little, Too Old, or Not the Right Type): Yeast that’s expired, improperly stored, or under-measured won’t generate enough lift. Check the expiration date, store yeast airtight (refrigerator or freezer is best), and measure carefully. If the loaf is dense and also noticeably short, try replacing the yeast first before changing the recipe.
- Under-Kneading or Poor Gluten Development: The dough needs enough kneading to build structure that can trap gas. If your machine is struggling to knead (very stiff dough, too much flour, paddle not moving smoothly), gluten won’t develop well and the loaf will be dense. Make sure the knead bar is seated properly, and focus on getting the dough to the right consistency during the knead so the machine can do its job.
If you want the simplest troubleshooting step for dense bread, watch the dough for a minute during kneading. A bread machine loaf that’s heavy almost always started with dough that was too dry or too stiff.
Burned Loaf, Thick Crust, or Dark Crust Color
If your bread has a burnt exterior, an overly thick crust, or a very dark color, it can be a sign that the baking cycle or settings need some adjustment. These issues are often related to overbaking, incorrect settings, or ingredient imbalances.
- Too Long a Baking Cycle: If your bread bakes for too long, it can result in a burned loaf and overly dark or thick crust. Check your bread machine settings and make sure you’re using the correct cycle for the type of bread you’re baking (e.g., a lighter or medium crust setting). Use the light crust setting if your machine has one to help prevent overbaking.
- Dark Crust Setting: Using the “dark crust” setting can sometimes result in a crust that is too thick or too dark, especially if you’re baking a recipe that doesn’t need as much time. Try using the “light” or “medium” crust setting to ensure a more balanced result.
- Too Much Sugar: Sugar promotes browning and can cause the crust to become overly dark or even burn. If your recipe has a high sugar content, try reducing the sugar by 1 teaspoon to avoid excessive browning, or choose the “light” crust setting for sweet breads.
- Too Much Yeast: Excess yeast can cause the bread to rise too quickly, which may lead to overbaking in the machine’s heating cycle, resulting in a burned loaf or too thick of a crust. Use the correct amount of yeast and make sure you’re following the recipe’s recommendations.
- Wrong Type of Flour: Certain flours, such as bread flour, have more gluten and may create a denser loaf, leading to a thicker, chewier crust. If you find the crust is too thick or chewy for your tastes, try using all purpose flour instead.
- Power Surges or Machine Malfunction: If your machine malfunctions or experiences a power surge during baking, it could cause the bread to bake at an excessively high temperature, resulting in a burned loaf. If you suspect a malfunction, check your machine for any issues and consider calling for service.
Bread Sticks to Pan
Bread machine pans are supposed to be non-stick, but that doesn’t mean it’ll always work out that way in the real world. Sometimes, the problem is with the recipe, and other times, it’s the pan itself.
In general, you can help with this issue by lightly greasing the pan before you begin. Be sure to use butter or a neutral oil rather than cooking spray.
- Old Bread Pan: Over time, the non-stick coating inside the bread pan can wear down, causing the bread to stick. If this happens, you may need to replace the pan. Avoid using metal tools in nonstick pans, as they can scratch the coating. If your pan is relatively new and it’s happening for the first time with this recipe and other recipes bake fine, then your pan is likely not the problem.
- Incorrect Amount of Fat in the Recipe: Some bread recipes, especially those for soft or sweet breads, require added fat to help prevent sticking. If you’re not using the proper amount of butter, oil, or another fat, the bread may stick to the pan. If you’re making a low-fat recipe, you might want to consider adding a teaspoon of vegetable oil to the liquid ingredients to help with release.
- Don’t Use Cooking Spray: While it might seem like an easy solution, avoid using cooking sprays (like aerosol sprays) on your bread machine pan. These can leave a sticky residue that actually makes the bread stick more. Stick to using oil, shortening, or butter instead
- Not Allowing the Bread to Cool: If you try to remove the bread immediately after baking, it may stick because it hasn’t had time to set. Allow the bread to cool for about 10-15 minutes in the pan before trying to shake it out. This will help the loaf firm up and reduce the likelihood of sticking.
Tested Bread Machine Recipes
Sometimes, the issue is user error or machine error, but other times, it’s just a bad recipe. These are my favorite, time-tested bread machine recipes:
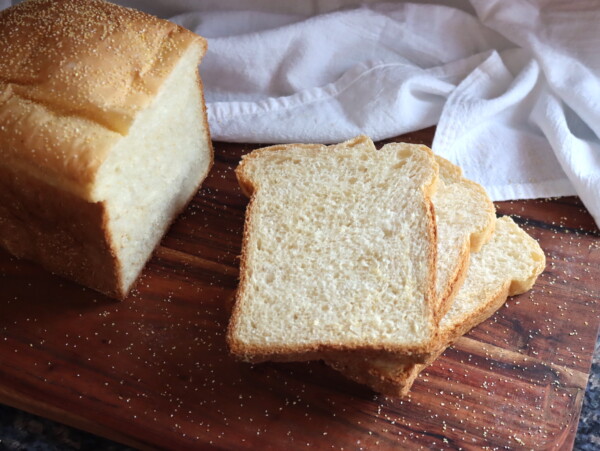
- Bread Machine Honey White Bread
- Bread Machine Whole Wheat Bread
- Bread Machine Brioche Bread
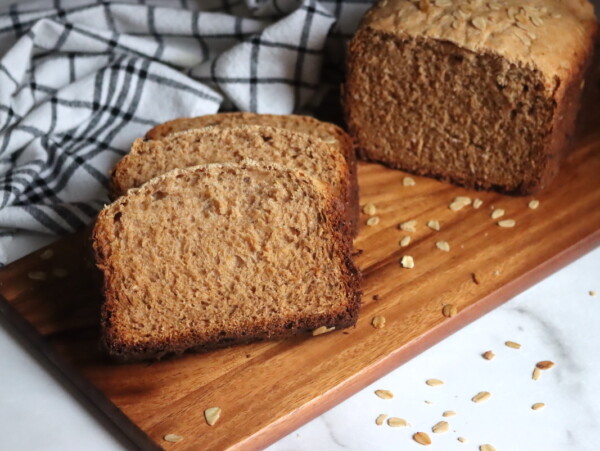
- Bread Machine Honey Oat Bread
my bread cracks on the side
Oh no! I’ve added a section to the troubleshooting article for you to address that.