This post may contain affiliate links. Please see our disclosure policy.
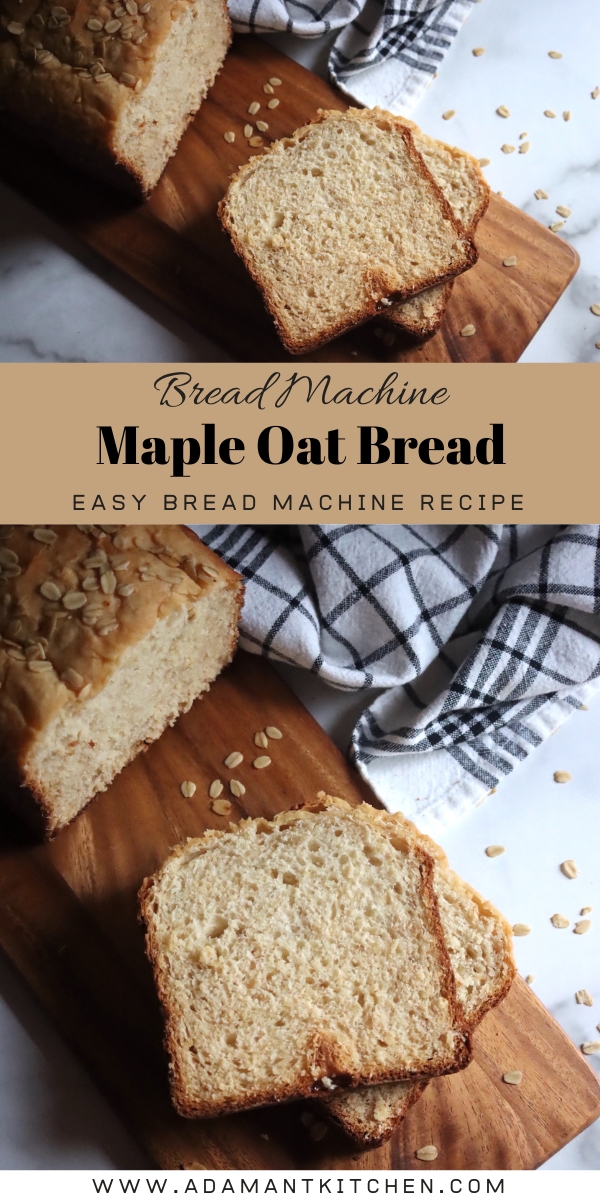
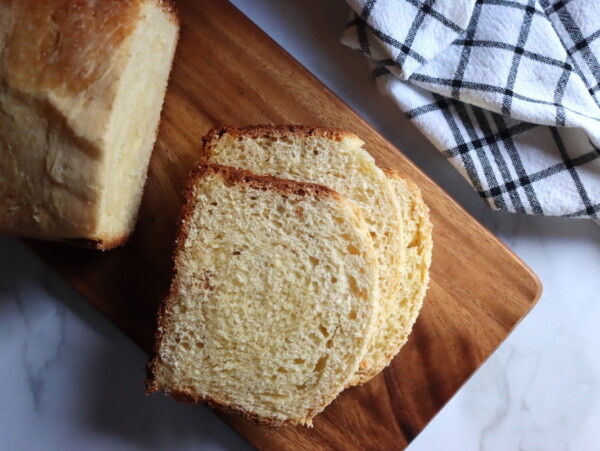
Bread machine maple oat bread is a hearty, lightly sweet sandwich loaf with real maple syrup, buttermilk for tang, and rolled oats for soft, wholesome texture. Easy enough for a weekday loaf and special enough for the breakfast table.
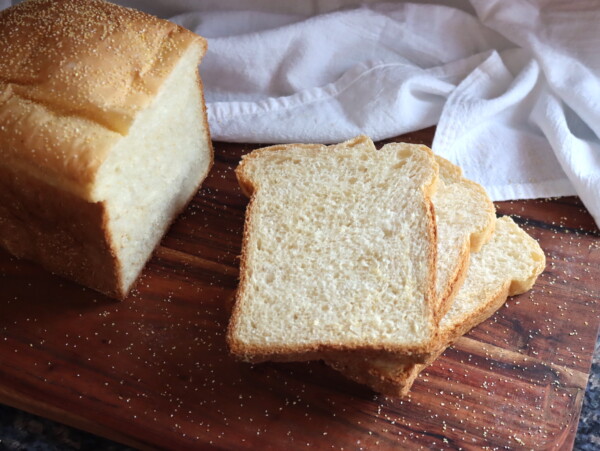
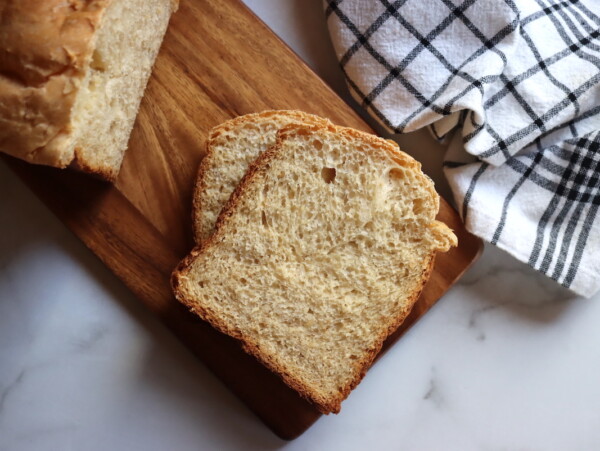
Maple oatmeal bread is one of those recipes that makes the kitchen smell like a New England diner. The sweetness is gentle (you taste the maple, not the sugar), the buttermilk gives the crumb a subtle tang and helps the loaf rise tall, and the oats add that hearty bite that pairs beautifully with butter and jam. It’s wonderful in sandwiches (heartier than my plain Bread Machine White Bread), but it’s also at home on the breakfast table as toast or alongside a cozy bowl of soup at dinner.
This is one of two oat-based bread machine recipes on the site, and they serve different purposes. My Bread Machine Honey Oat Bread is a milder, plain-milk-and-honey sandwich loaf, the kind kids will eat without question. This maple oat version has more pronounced flavor from the buttermilk and pure maple syrup, and is the one I reach for when I want a loaf that stands up to dinner soups or earns its place on the breakfast table.
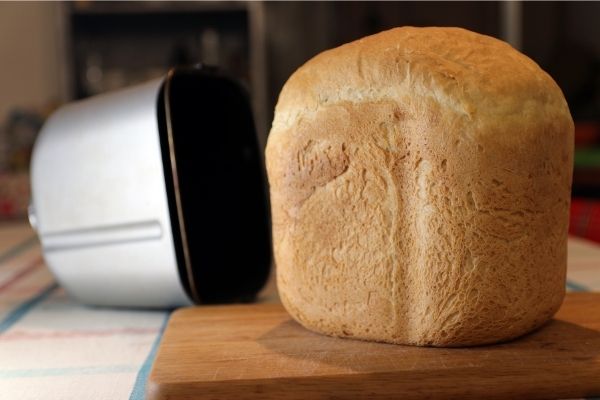
Living in Vermont means I take maple syrup seriously. For this bread specifically, you want a darker grade, which has more maple flavor and stands up to baking better than the lighter table syrups. I’ve tested this recipe in my Zojirushi Home Bakery Supreme, in a budget Cuisinart bread machine, and in smaller vertical-loaf machines, and it works in all of them.
The recipe card has 2-pound and 1 1/2-pound amounts, with notes for 1-pound machines. See the Variations section below for an oven-baked version (for readers without a bread machine), a whole wheat version, and a sweeter dessert-style loaf, or browse my full collection of bread machine recipes.
Why you’ll love this family favorite recipe!

We tap our own maple trees here in Vermont every spring, and a year’s worth of syrup ends up in everything from morning pancakes to the rare but excellent Maple Banana Bread to this loaf, which has become our standard “guests are visiting” bread. There’s something about offering houseguests a slice of warm maple oat bread with butter that immediately establishes you as the kind of host who has their act together, regardless of how the rest of the house actually looks.
My kids each have their preferred way of eating it: my oldest takes it as breakfast toast with jam, my youngest insists on a smear of butter and another drizzle of maple syrup on top (which is admittedly excessive but who am I to argue, and I’m always tempted to top mine with homemade apple butter when we have a jar in the fridge). My husband eats it with sharp cheddar and a bowl of tomato soup at lunch. It’s the rare loaf that genuinely works at every meal, and it’s been in our regular rotation for years.
Quick Look at the Recipe
- Makes: 1 loaf, about 10 slices
- Active prep: 5 minutes (10 if adding the oat topping)
- Total time: about 3 hours (basic white cycle)
- Loaf size: 2 lb (1 1/2 lb and 1 lb amounts in recipe notes)
- Machine setting: Basic White cycle, light or medium crust (the maple syrup will brown faster than plain bread, so dark crust will burn it)
- Flour: 4 cups all-purpose or bread flour, plus 1 cup old-fashioned rolled oats
- Yeast: 2 1/2 tsp SAF instant yeast (also sold as bread machine yeast), added to the dry ingredients
- Important: Cannot be used with the delay timer because of the buttermilk
Ingredients for Bread Machine Maple Oat Bread
The flavor of this bread depends on three things: real pure maple syrup (not table syrup), good buttermilk for tang and lift, and old-fashioned rolled oats for hearty texture. Everything else is standard pantry.
The recipe is written for a 2-pound loaf, the default on most modern bread machines, with 1 1/2-pound amounts in the recipe notes. To make a 1-pound loaf on a small machine, cut the 2-pound amounts in half.
Add the ingredients in two batches: liquid ingredients first into the bottom of the pan, then dry ingredients on top. This keeps the yeast dry until the cycle starts. Note: this recipe cannot be used with the delay timer because of the buttermilk.
- Buttermilk: The signature liquid in this bread. Buttermilk’s acidity reacts with the yeast to give a higher rise, and adds a subtle tang that balances the sweetness from the maple syrup. Use real buttermilk if you have it. If not, make “quick buttermilk” by adding 1 tablespoon of apple cider vinegar (or white vinegar, or lemon juice) to your measuring cup and filling to the volume needed with regular milk; let sit for 5 minutes before using. Plain milk works in a pinch but the loaf will be sweeter and won’t have the tang.
- Pure maple syrup: The flavor backbone. Use real pure maple syrup, not pancake syrup or table syrup (which are corn syrup with maple flavoring). For best results in baking, use a darker grade (Grade A Dark Amber or Grade A Very Dark, formerly called Grade B); the darker the syrup, the more maple flavor. Lighter syrups work but the maple flavor will be subtle. Pure Vermont maple syrup is what I use, but any quality real maple works.
- Butter: Adds tenderness and helps the crumb stay soft. Cut into pieces so the machine can incorporate it. Any neutral oil (canola, grape seed, avocado oil, etc.) can be substituted, but butter is the better match for the maple flavor.
- White flour: All-purpose or bread flour both work. I usually use King Arthur All-Purpose because it’s what I keep in bulk. Bread flour gives a slightly firmer crumb and higher rise; AP gives a softer, more tender crumb. See the flour notes below for more detail.
- Old-fashioned rolled oats: Use old-fashioned rolled oats (also called rolled oats), not quick oats or instant oatmeal. Old-fashioned oats keep their texture through the bake and give the bread its characteristic hearty bite. Quick oats will dissolve into the crumb and you lose the texture. Steel-cut oats do not work in this recipe.
- Salt: Essential for flavor and yeast regulation. Do not skip or reduce.
- SAF instant yeast: The rising agent. SAF instant yeast is what I use. Bread machine yeast is the same product as SAF instant and uses the same amount. For active dry yeast, see the notes below.
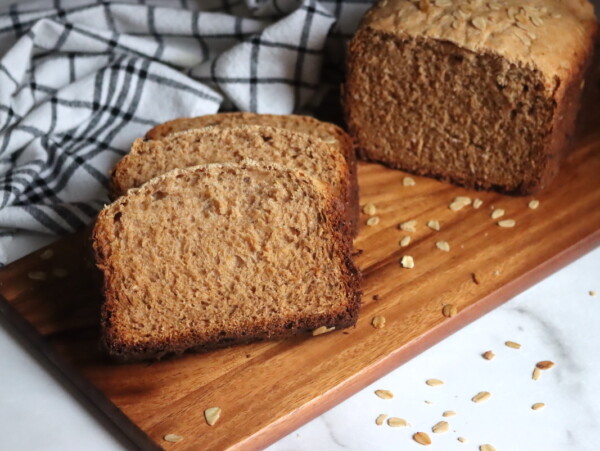
In terms of flour choice, all-purpose and bread flour both work. All-purpose gives a softer, more tender crumb that works beautifully for breakfast toast. Bread flour (higher protein) gives a firmer, taller loaf that slices cleanly for sandwiches. If you use bread flour and the dough looks dry in the first minutes of kneading, drizzle in 1 tablespoon of extra buttermilk (or water). For a heartier whole grain version, swap up to half the white flour for whole wheat; see the Variations.
For yeast, SAF instant yeast and bread machine yeast are the same type of yeast, placed in a well on top of the flour with the dry ingredients (they do not need to be dissolved). If you only have active dry yeast, use an extra 1/2 teaspoon and dissolve it in a few tablespoons of warm water (not the buttermilk; the cold buttermilk won’t activate it well) for 10 minutes until foamy, then add to the pan with the buttermilk. Do not use the delay timer with this recipe under any yeast type because the buttermilk is perishable and shouldn’t sit in the pan for hours. If you run into rise issues, check the Bread Machine Troubleshooting Guide.
How to Make Bread Machine Maple Oat Bread
This is a true “set it and walk away” recipe, with one optional fancy step at the end (the oat topping) for bakery-style presentation.
Step 1. Add the liquid ingredients to the bread pan first. Buttermilk, then maple syrup, then the cut-up butter pieces. Pour the maple over the buttermilk so it rinses off the measuring cup cleanly.
Step 2. Add the flour on top of the liquid, covering it completely. Think of the flour as an island floating on top of the buttermilk. The yeast needs to stay dry until the machine starts kneading.
Step 3. Sprinkle the oats over the flour, then make a small well for the salt and yeast. Keep the salt on one side of the well and the yeast on the opposite side; direct contact between salt and yeast can slow the yeast down.
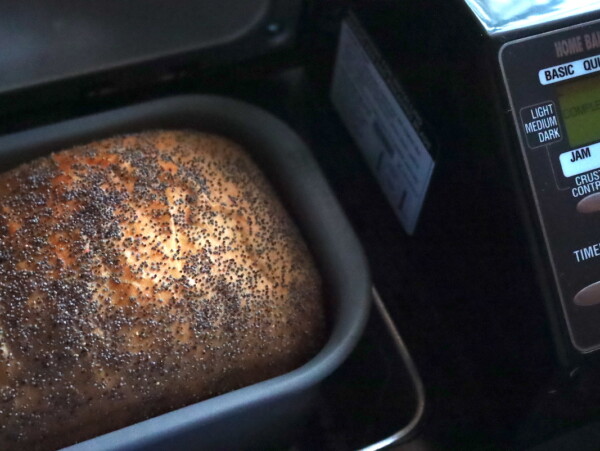
Step 4. Select the Basic White cycle and light (or medium) crust. The maple syrup browns faster than plain bread, so do not use the dark crust setting. Most machines produce a properly golden crust on the light or medium setting with this recipe.
Step 5. Press start. Watch the first 2 to 3 minutes of kneading. The dough should form a smooth ball that pulls away from the sides. Buttermilk doughs sometimes look slightly stickier than plain milk doughs at first; if it looks too wet, add 1 tablespoon of flour. If it looks dry, drizzle in 1 tablespoon of buttermilk or water.
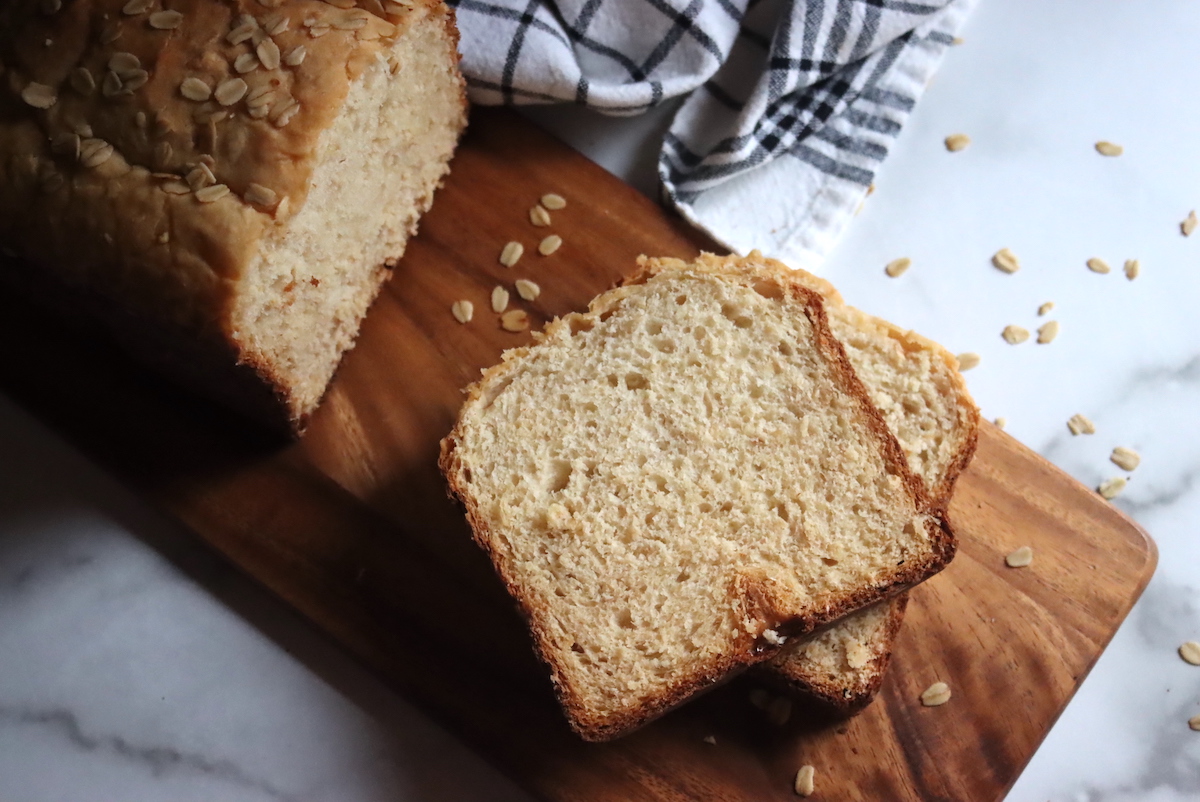
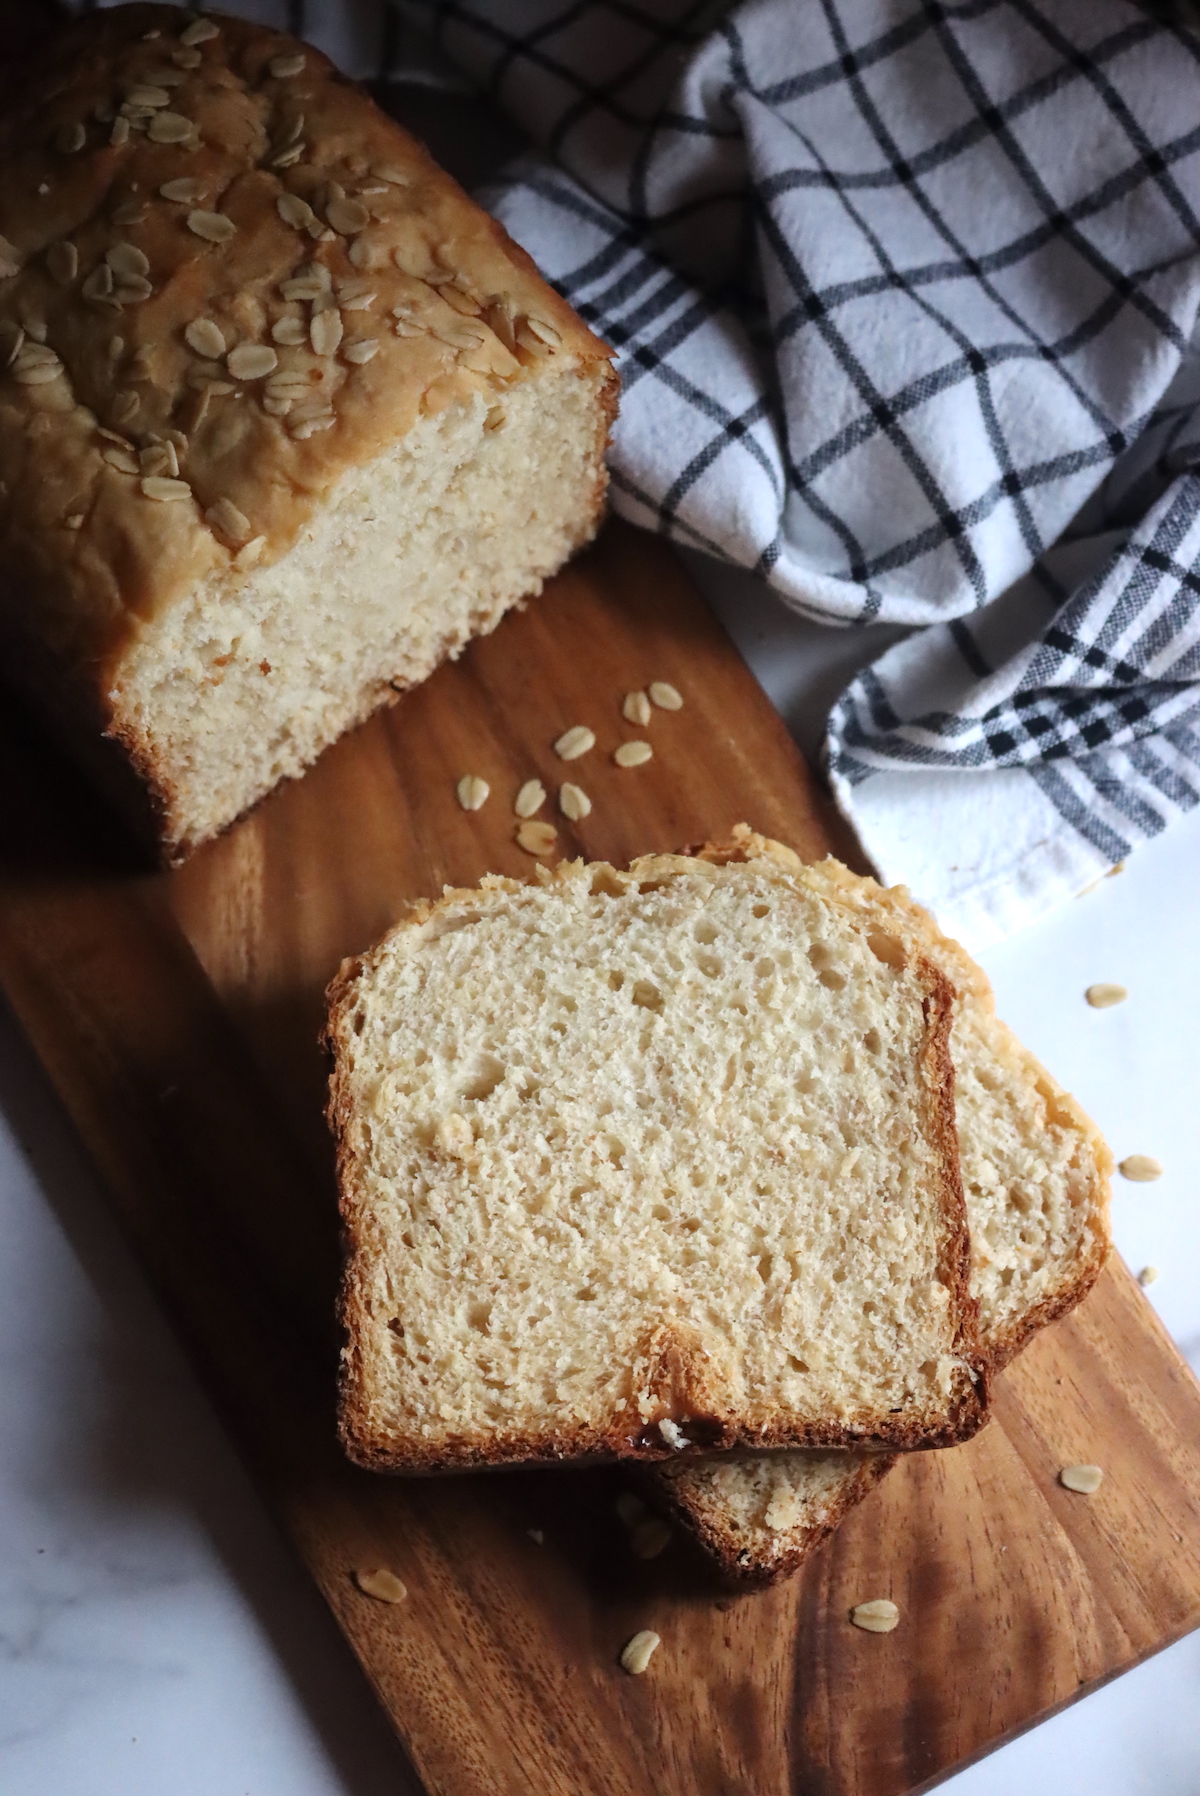
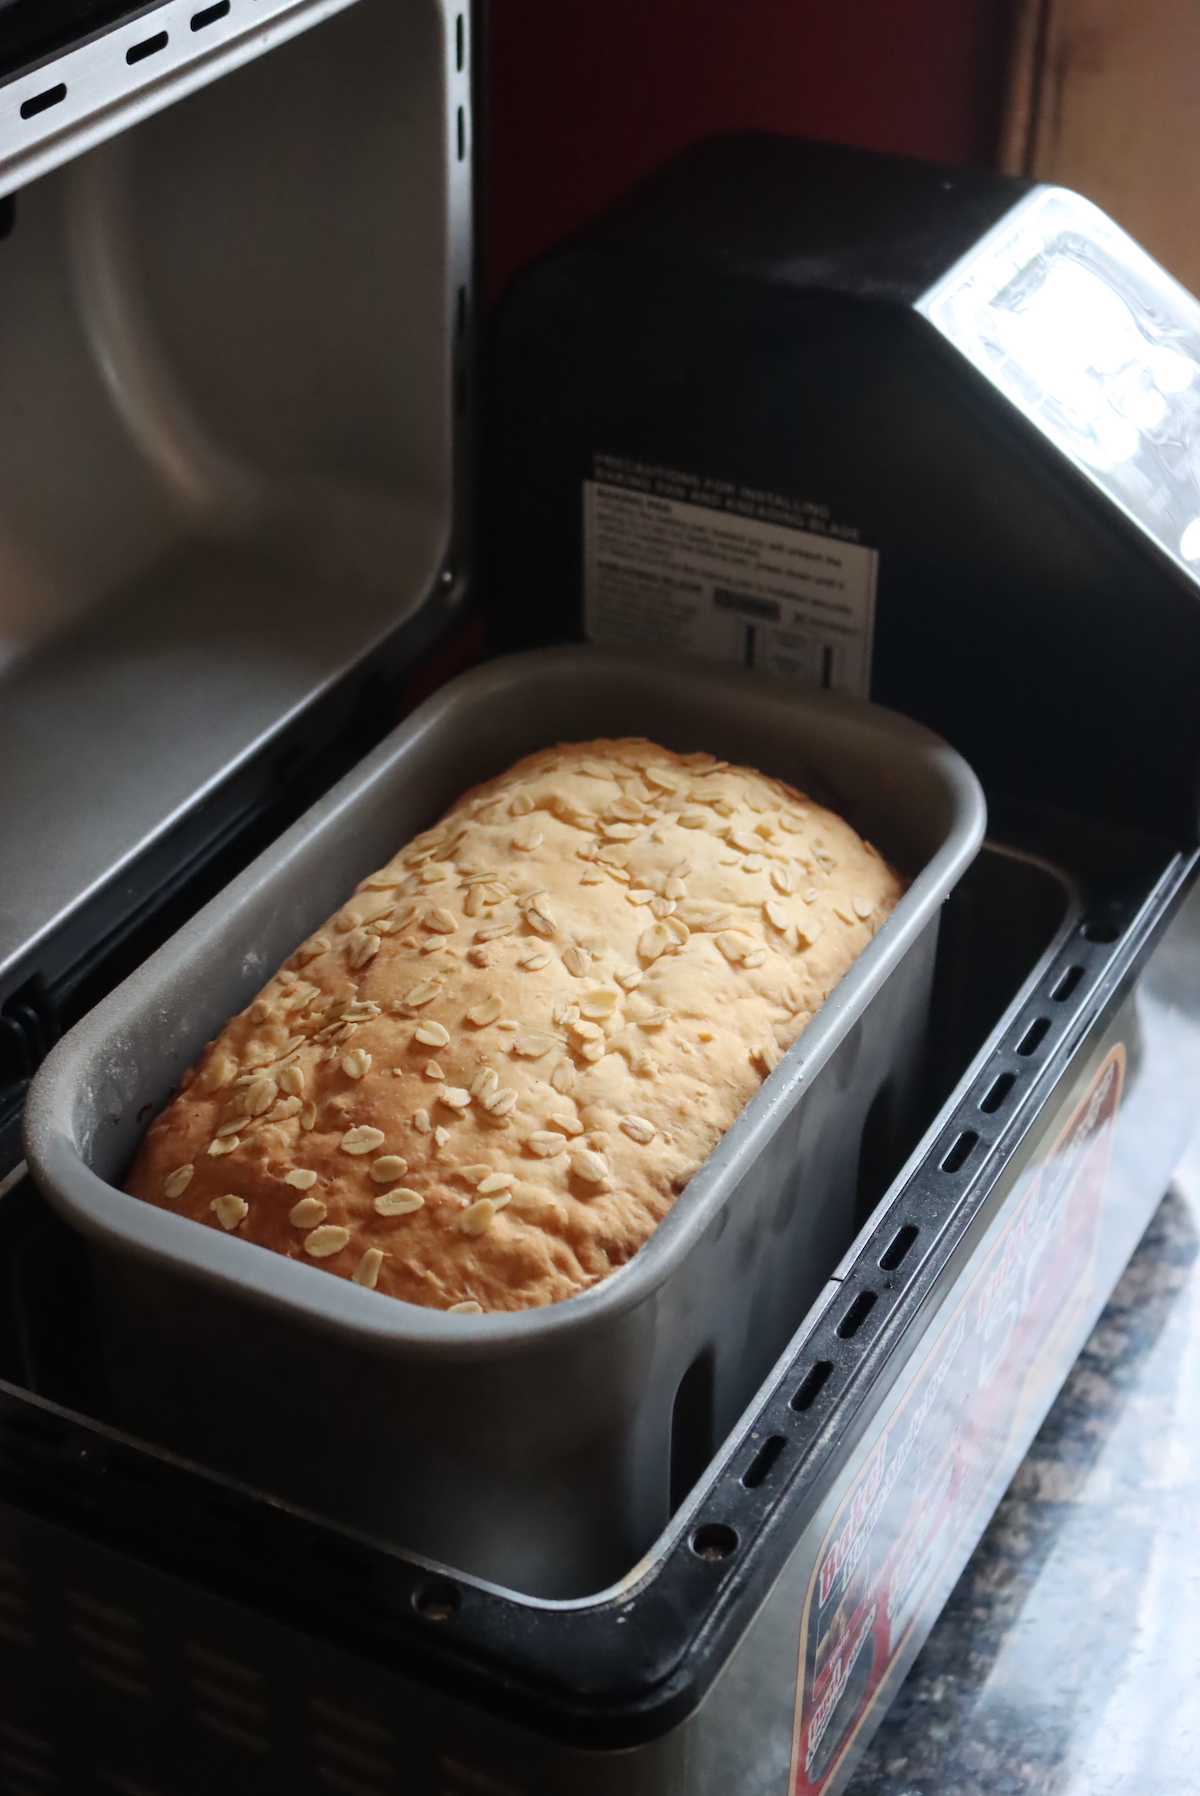
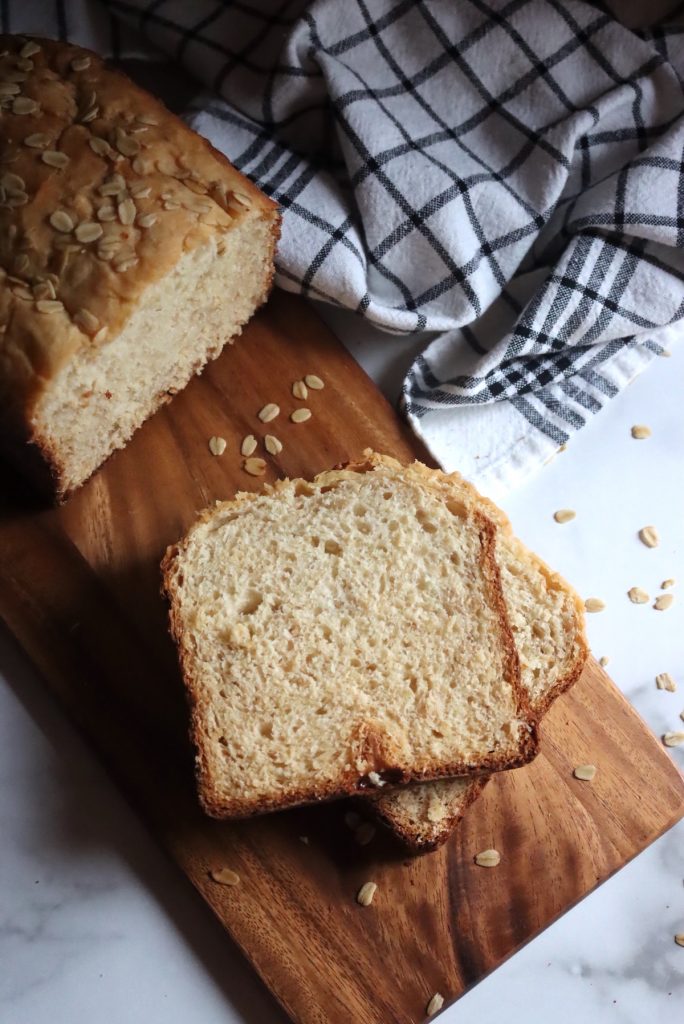
Step 6. Optional: add the oat topping right before the bake cycle starts. About an hour before the cycle ends (which is right after the last rise, before the bake), open the lid, brush the top of the dough with 1 tablespoon of melted butter, and sprinkle on 1 to 2 tablespoons of old-fashioned oats. Press the oats gently into the butter so they stick. Close the lid and let the bake continue. This is what gives the loaf its bakery look. Skip this if you don’t want to watch the clock.
Step 7. Remove the loaf when the bake cycle finishes. Turn it out onto a wire rack and let it cool completely before slicing, ideally at least 1 hour. Slicing warm bread tears the crumb.
Recipe Tips
Use real maple syrup, and the darker the better. Pancake syrup (corn syrup with maple flavor) will not give you the right flavor and changes the dough’s behavior. Real pure maple syrup, especially Grade A Dark Amber or Grade A Very Dark (formerly called Grade B), gives the most maple flavor in baking. The lighter Grade A Amber works but produces a much subtler maple taste in the finished loaf. If you only have light maple, you can boost flavor with 1/2 teaspoon of maple extract.
Use light or medium crust, never dark. The maple syrup contains enough natural sugar that the crust browns faster than plain bread. Dark crust setting will produce a burnt or near-burnt result on this recipe. Stick with light or medium even if you usually prefer dark crust on other breads.
Watch the dough during the first 2 to 3 minutes of kneading. The dough should form a smooth ball that pulls cleanly away from the sides of the pan. If it looks too dry, drizzle in 1 tablespoon of buttermilk (or water) at a time. If too wet, add 1 tablespoon of flour at a time. Buttermilk’s thickness can vary by brand, so the dough may need a small adjustment.
Do not use the delay timer. Buttermilk is perishable and should not sit in the pan for hours before the cycle starts. If you want to use the delay timer, substitute regular milk for the buttermilk (the loaf will be slightly less tangy and rise slightly less, but it works).
For vertical-loaf machines, the oat topping still works. The dough rises into the top portion of the pan, so when you open the lid before the bake, you can brush the top and sprinkle oats just like a horizontal machine. The shape will be different (taller and narrower) but the topping technique is identical.
If the loaf rises too high or comes out cake-like, reduce the yeast. A few readers with very compact bread machines have found that this recipe over-rises and turns cake-like. If this happens to you, try 2 tsp SAF (instead of 2 1/2 tsp) for the 2-pound loaf, or check the Bread Machine Troubleshooting Guide for more fixes.
Cool completely before slicing. A full hour on a wire rack makes a real difference. Buttermilk-based loaves are particularly prone to gummy slices if cut warm.
Variations
This recipe is the baseline for several easy variations. Each is a simple tweak from the base recipe:
- Whole wheat maple oat bread: For a heartier, more wholesome loaf, swap 2 cups of the white flour for King Arthur Whole Wheat Flour. Keep the other 2 cups as white. Add 1 to 2 tablespoons of extra buttermilk if the dough looks dry. Do not exceed half whole wheat or the loaf will be dense. For a milder whole wheat flavor, try King Arthur Golden Wheat Flour (their white whole wheat) instead.
- Honey-sweetened oat bread: If you’d prefer honey to maple, use my Bread Machine Honey Oat Bread instead, which is the closest sibling to this recipe. The two breads are similar in spirit but use different liquids (plain milk vs buttermilk) and different sweeteners.
- Plain milk version (no buttermilk): If you don’t have buttermilk and don’t want to make the quick-buttermilk substitute, use plain milk in the same amount. The loaf will be slightly sweeter (no tang to balance the maple) and will rise slightly less, but it works. This version IS compatible with the delay timer.
- Sweeter dessert-style maple oat bread: Increase the maple syrup to 2/3 cup for the 2-pound loaf and reduce the buttermilk by 2 tablespoons to compensate. Reduce the yeast by 1/2 teaspoon so the loaf doesn’t over-rise from the extra sugar. The result is bakery-sweet and excellent for French toast.
- Sugar-free / unsweetened oat bread: Omit the maple syrup entirely (a reader recently asked about this and it does work). The loaf will be a plain buttermilk oat bread, more savory than sweet. You may want to add 1 to 2 tablespoons of buttermilk to compensate for the lost liquid volume from the maple, and reduce the yeast slightly (to 2 tsp for the 2-pound loaf) since there’s less sugar to feed it.
- Oven-baked maple oat bread (no bread machine): Several readers have asked about making this without a bread machine. Use a stand mixer with a dough hook (or knead by hand for 8 to 10 minutes). Combine all ingredients except the topping, knead until smooth and slightly tacky, then rise covered for about 90 minutes until doubled. Punch down, shape into a loaf, place in a greased 9×5 loaf pan, rise again until 1 inch above the pan rim (60 to 90 minutes). Brush with melted butter and sprinkle with oats if you want the topping. Bake at 350°F for 35 to 40 minutes until the internal temperature reaches 190°F.
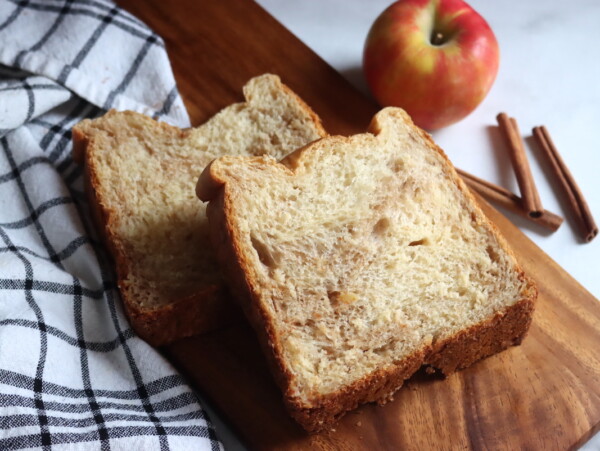
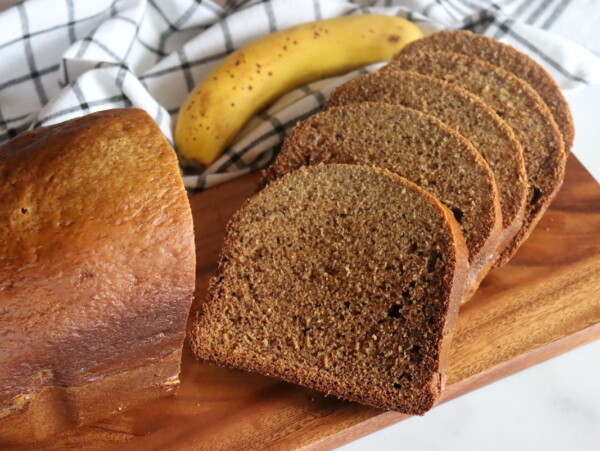
- More maple bakes to try: If you love maple in baked goods, try my Maple Banana Bread for a quick-bread style loaf, or my Maple Shortbread for a simple gluten-free cookie. Both lean on the same dark-grade maple syrup that makes this bread shine.
- More bread machine recipes to try: Pair this with my Bread Machine Cinnamon Raisin Bread for breakfast, my Bread Machine Honey Wheat Oat Bread for a whole grain alternative, or my Bread Machine English Muffin Bread for the same hearty breakfast slot with a different texture entirely.
Received a bread machine for Christmas and this was one of the first recipes I tried. It is so good! I’ve made it multiple times since and when I don’t have any I crave it lol.
FAQs
Yes. The easiest substitute is quick buttermilk: add 1 tablespoon of apple cider vinegar (or white vinegar, or lemon juice) to your measuring cup, then fill to the volume needed with regular milk. Let sit for 5 minutes before using. Plain milk also works without any acid added; the loaf will be slightly sweeter and won’t have the tangy buttermilk note. The plain milk version is also compatible with the delay timer (the buttermilk version is not).
Yes. Combine all ingredients in a stand mixer with a dough hook and knead 8 to 10 minutes (or knead by hand the same amount of time) until smooth and slightly tacky. Rise covered for about 90 minutes until doubled. Punch down, shape into a loaf, place in a greased 9×5 loaf pan, rise again until 1 inch above the pan rim (60 to 90 minutes). Bake at 350°F for 35 to 40 minutes until the internal temperature reaches 190°F. Cool completely before slicing.
You can omit the maple entirely; the result is a plain buttermilk oat bread. Add 1 to 2 tablespoons of extra buttermilk to compensate for the liquid volume, and reduce the yeast slightly (to 2 tsp for a 2-pound loaf). Sugar-free maple-flavored syrups (the kind without real maple) typically work, but the texture may be slightly different because real maple syrup has a specific sugar profile that affects browning and yeast behavior; expect a slightly less tender crumb.
They’re close cousins but suit different occasions. Honey Oat Bread uses plain milk and honey, giving a milder, kid-friendly sandwich loaf. This Maple Oat Bread uses buttermilk and pure maple syrup, giving more pronounced flavor with tang and maple character. Honey Oat is the everyday lunch loaf at our house; Maple Oat is the breakfast and dinner loaf.
No. Self-rising flour relies on baking powder for leavening, which doesn’t work the same way as yeast and won’t give you the texture of a yeasted bread. Bread machine recipes need yeast; use the SAF instant or bread machine yeast called for in the recipe (or active dry with adjustments noted above). For a quick-bread alternative, see my Maple Banana Bread, which uses baking powder and bakes in the oven.
About 4 to 5 days at room temperature in a bread bag or wrapped in a clean dish towel. The buttermilk and maple keep this loaf moist longer than plain sandwich bread. Do not refrigerate; refrigeration speeds up staling. For longer storage, slice the whole loaf and freeze in a zip-top bag; frozen slices toast straight from the freezer and make exceptional French toast.
Bread Machine Recipes
If you tried this Bread Machine Maple Oat Bread recipe, or any other recipe on Adamant Kitchen, leave a ⭐ star rating and let me know what you think in the 📝 comments below!
And make sure you stay in touch with me by following on social media!
Bread Machine Maple Oat Bread
Equipment
Ingredients
Liquid Ingredients (add first)
- 1 ⅔ cups buttermilk
- ½ cup maple syrup
- 3 Tbsp. butter, unsalted, cut into pieces
Dry Ingredients (on top of wet)
- 4 cups White Flour, All Purpose or bread flour
- 1 cup rolled oats
- 2 tsp. alt
- 2 ½ tsp. SAF Instant Yeast, or 1 tablespoon active dry yeast
Instructions
- Add the liquid ingredients to the bread pan in this order: buttermilk, maple syrup, butter pieces.
- Add the flour on top, covering the liquid completely.
- Sprinkle the oats over the flour. Make a small well and place the salt on one side, the yeast on the opposite side.
- Select the Basic White cycle. Use light or medium crust setting (the maple syrup browns faster than plain bread; do not use dark).
- Press start. Watch the first 2 to 3 minutes of kneading. Dough should form a smooth ball. Add 1 tablespoon of buttermilk if dry; 1 tablespoon of flour if wet.
- Optional: about 1 hour before the cycle ends (after the last rise, before the bake), open the lid, brush the dough top with melted butter, and sprinkle with oats. Press gently so they stick.
- Let the machine complete the cycle.
- Remove the loaf onto a wire rack. Cool completely (at least 1 hour) before slicing.
Notes
- 1 ⅓ cups (320 ml) buttermilk
- ⅓ cup (80 ml) pure maple syrup
- 2 Tbsp. (28 g) unsalted butter, cut into pieces
- 3 cups (360 g) All Purpose White Flour (or Bread Flour)
- ¾ cup (70 g) rolled oats
- 1 ½ tsp. (9 g) salt
- 2 tsp. (6 g) SAF yeast (or 2 ½ teaspoons bread machine yeast)
- SAF instant yeast or bread machine yeast: 2 1/2 tsp (these are the same product; interchangeable 1:1).
- Active dry yeast: 3 tsp, dissolved in a few tablespoons of warm water (not buttermilk) for 10 minutes until foamy. Not compatible with the delay timer.
- Cake-like or over-risen: reduce yeast to 2 tsp on the next batch.
- Dense loaf: old yeast, salt touching yeast, or too much oats. Use fresh yeast and check measurements.
- Burnt crust: maple browns fast. Use light crust, never dark.
Nutrition
Nutrition information is automatically calculated, so should only be used as an approximation.
50+ Bread Machine Recipes
Bread machine recipes can be hard to find, as bread makers were most popular before the internet became a thing. …
Find the perfect recipe
Searching for something else? Enter keywords to find the perfect recipe!
Can I omit the maple syrup?
Yes, that’s optional. Enjoy!
Excellent recipe! I used “Course 1” with the Zojirushi BB-PDC20, and the loaf turned out perfectly.
Glad to hear it!