This post may contain affiliate links. Please see our disclosure policy.
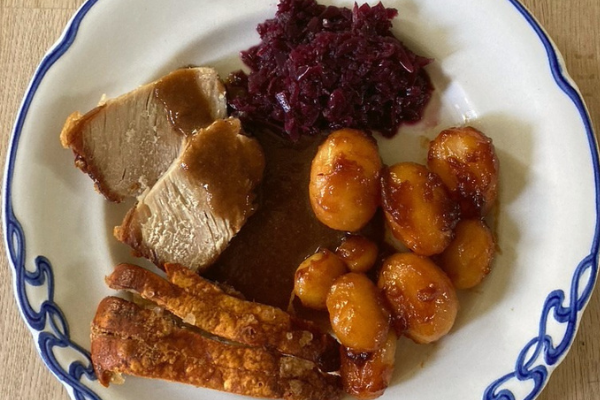
Danish flæskesteg is a pork roast with deliciously crispy rinds. It’s served with rødkål, brunede kartofler and a flavourful brown sauce.
(This post is written by Pia Sonne, a native of Denmark and the writer behind the blog Busy Hands, Quiet Hearts.)
Danes eat flæskesteg all year round but it’s a favorite Danish Christmas recipe.
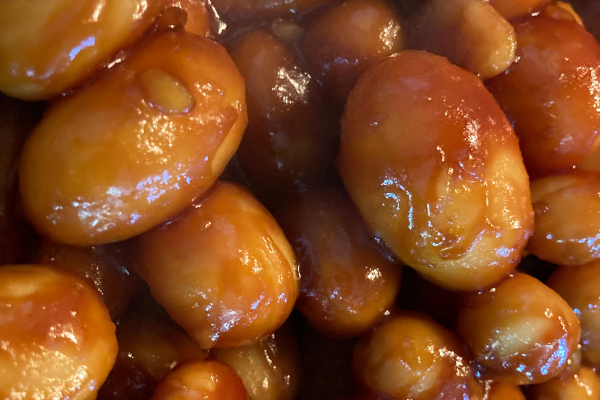
Flæskesteg is served warm for dinners and cold for lunches, often with a side of either warm or cold rødkål (a spiced red cabbage dish) and brunede kartofler (caramelized potatoes), as well as boiled white potatoes.
When flæskesteg is served for lunch it’s often part of an array of smørrebrød, which are open-faced rye bread sandwiches. It’s served with plenty of cold rødkål on a well-buttered piece of rugbrød (rye bread).
The History of Flæskesteg
Pork has been celebratory meat since the Medieval Ages. Pork roast has been part of the Danish Christmas Feast ever since then.
The pigs were fattened over the fall in the woodlands and slaughtered in November. Come December 24th, the pork roast hadn’t been in the brine for too long and was a delicious treat.
It wasn’t until the arrival of the stove that the crispy rinds became almost a status symbol of your ability as a housewife (or cook). While pork rinds are now a popular snack in many countries, Danes were one of the few people who traditionally ate the skin of pigs. Every bit but the squeal was (and still is) used in some way.
With the convenience of freezers, pork roast became more of an all year occurrence and is now served every day of the year by any self-respecting smørrebrødsbutik (open-faced sandwich shop).
Specialty Equipment, Ingredients & Techniques
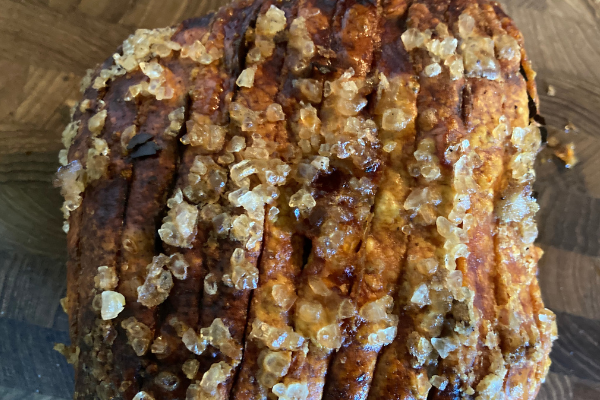
You don’t need anything fancy to cook a great flæskesteg, but the rinds, flæskesvær, make or break the experience. Even the best of home cooks occasionally face soggy rinds, so don’t beat yourself up if it takes you a while to master that perfectly crisp texture.
Crispy rinds happen when minuscule amounts of water which are trapped in the different layers of the rind turn into steam. This creates little bubbles that harden and result in a crispy texture.
In a sense, water is your greatest enemy when your goal is to get crispy rinds (except if you chose to use the pre-boiling method mentioned below). Magnus Nilsson shares in The Nordic Cookbook that he buys the roast a few days prior to cooking it. He then scores it right away and lets it sit uncovered in the fridge to dry out. It’s not a widely common practice in Denmark but undoubtedly helps.
Here are some other tips that will significantly help you achieve crispy flæskesvær:
- You need a roast with a good layer of fat. No skinny pigs will do, you need more than 1 inch of fat.
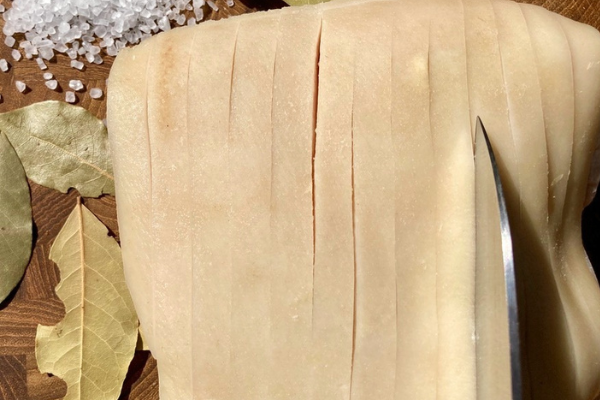
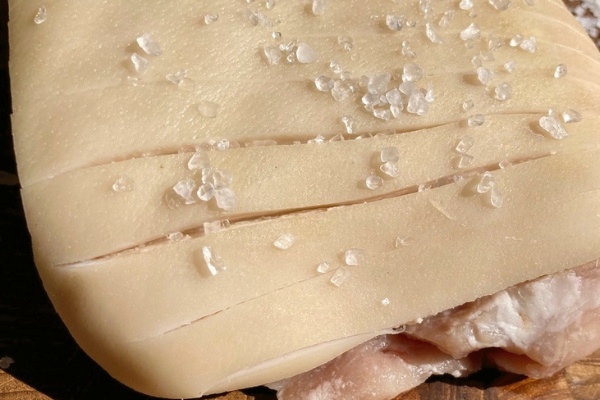
- Be careful when scoring the skin, you need to cut deep enough through the skin and down into the fat layer without cutting into the meat. In Denmark, you can buy pre-cut flæskestege, but these cuts aren’t deep enough and you need to go over them carefully.
- If the method described in the recipe doesn’t give you a good result, then don’t give up. Next time you make a flæskesteg, try placing the roast skin side down in a pan and pour enough boiling water into the pan to cover the skin. Place in the oven for 20 min, after the time is up, take the roast out and turn it skin side up. Add all your spices and let it finish roasting in the oven. This essentially pre-boils the rinds and makes it a lot easier to achieve crispy rinds.
Variations in Denmark
There are three main cuts you can use for flæsesteg in Denmark:
- Svinekam (loin)
- Ribbenssteg (the side)
- Nakkekam (a piece of the back close to the neck)
Ribbenssteg and nakkekam seem to be the more popular options. As long as there’s still a good layer of fat and all the skin remains, either of the three cuts will make a great flæskesteg.
Flæskesteg in Other Countries
Flæskesteg is also popular in Norway, where it’s almost exclusively made from the sidecut and thus referred to as ribbenstek (or juleribbe at Christmas time). It’s often served with fried apple wedges, small pork sausages, brown gravy with brown cheese and sugared lingonberries.
The biggest difference in the roast itself is how the crackling is cut. In Denmark, the skin is cut in long straight lines, making it easy to cut the roast and serve it in slices.
In Norway, the skin is cut into 1-1,5 inch squares and because it’s very difficult to cut through a properly crisp crackling, the roast is served in these smaller, but thicker sections.
Flæskesteg Ingredients
A good flæskesteg requires very few ingredients, so make sure to use the best you can get, as each ingredient plays a key role in the end result.
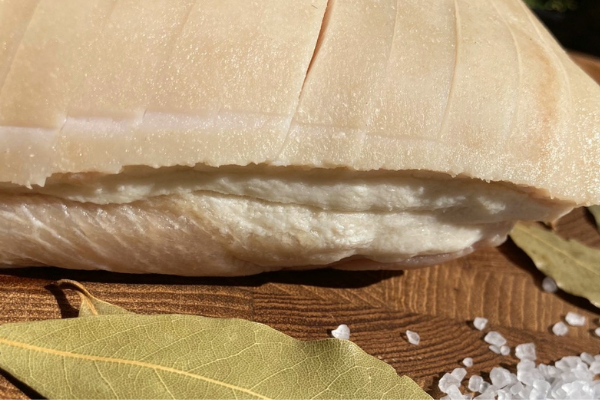
Pork roast – No matter if you choose a svinekam, ribbensteg or nakkekam, the cut you end up with must have a good layer of fat. If it has less than 1 inch it won’t make a good crackling. Additionally, the skin must be intact. If you have the ability to get a cut from a forest raised pig with access to acorns, it will greatly enhance the taste of the roast.
Bay leaves – These are optional but work wonders to flavour the brown sauce you can make from the roast juices. They are often placed in between the cuts in the rind, this does very little for the flavour, they are there mostly for show. To get the full effect of using the leaves, place them under the roast so the juices will drip down on them.
Salt – Coarse sea salt used liberally makes all the difference when it comes to your rinds.
Water – Use good, clean, filtered water.
How to Make Flæskesteg
This recipe is from The Nordic Cookbook by Magnus Nilsson, which is a fantastic resource for all things nordic cooking. First, you have to decide if you want to try the pre-boil method or not. If you don’t want to use the pre-boil method, then proceed as follows:
If you have 24-48 hours before you need to serve the roast, go ahead and cut it and let it rest uncovered in the fridge.
Preheat the oven to 400F (200C) and score the skin, by cutting through the skin and into the fat layer without cutting into the meat. Cut in long strips for a Danish roast.
Rub the roast with salt all over and make sure to get salt in between every strip you’ve cut.
Place a rack in a roasting pan and put the roast on top of the rack.
Pour water into the roasting pan until you have about 2.5 cm /1 inch of water in the bottom. Add some bay leaves, either between the strips or under the roast for more flavor.
Cook the roast in the oven until the internal temperature reaches 140F/60C. Keep an eye on the roast and if the crackling isn’t as crisp as you’d like, you can turn the temperature up to 480F/250C when the internal temperature of the roast hits 130F/55C. If you choose to turn up the heat, you need to keep an eye on the roast so the cracklings don’t burn.
You also have to keep an eye on the water level in the pan. It should never dry out as it will result in a sad, dry roast with no delicious gravy. You can add as much water as needed during the roasting, but keep the water level at no more than 1 inch/2.5cm.
Remove the roast from the oven once its internal temperature reaches 140F/60C and you are happy with the cracklings. Let it rest for 15 minutes or so while you make a brown gravy with the juices from the roast left in the roasting pan.

Danish Flæskesteg (Pork Roast)
Ingredients
- 4.5 lbs/2 kg Pork roast, loin, side or top of neck with skin and a minimum of 1 inch of fat.
- Bay leaves
- Coarse sea salt
- Water
Instructions
- Optional: Score your roast and let it sit uncovered for 24-48 hours in the fridge before use if possible.
- Preheat your oven to 400F / 200C.
- Score the roast with a very sharp knife if you haven't already. Cutting thin strips through the skin and fat but not into the meat.
- Rub the roast with plenty of salt, make sure to get salt in between all the cuts you made.
- Place the roast on a rack in a roasting pan and place the bay leaves under the roast.
- Pour water into the roasting pan until you have 1 inch/ 2.5 cm at the bottom of the pan.
- Place the roast in the oven and cook until it reaches an internal temperature of about 140F / 60C.
- Take the roast out of the oven and let it rest for about 15 min. before cutting and serving it.
Notes
- Make sure to have water in the bottom of the roasting pan at all times. Otherwise, you'll end up with a dry roast and no juices for the flavourful brown sauce.
- If the cracklings don't look crisp, you can turn up the temperature of the oven to 480F / 250C once the internal temperature of the roast hits 130F / 55C. Carefully watch the roast after doing so to avoid burning the cracklings.
Danish Recipes and Traditions
Looking for more information about Danish Christmas traditions and food?
- Danish Christmas Recipes
- 9 Danish Christmas Cookies (småkager)
- Danish Christmas Tradition
- Counting Down to Christmas – a Danish Holiday Tradition
Further Reading on Flæskesteg
This is why Danes eat as they do on Christmas Eve
Old farming traditions make Danes eat pork roast and duck.
Pork Roast – a Christmas tradition
Danish video on the history of the pork roast
Danish video on the pre-boiling method for perfectly crispy rinds

1 Comment