This post may contain affiliate links. Please see our disclosure policy.
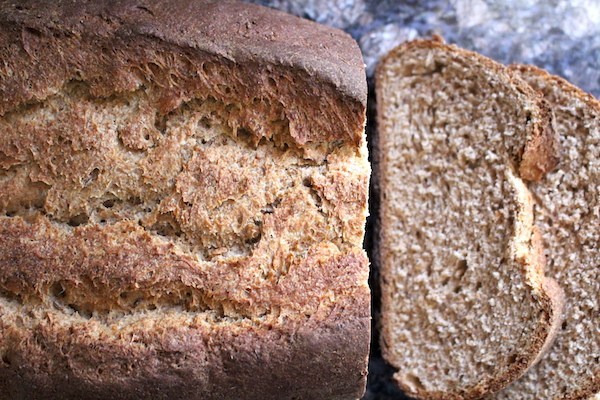
Pain de Méteil is French for a bread made of a “mix of cereals,” both whole wheat and rye. It’s an old school loaf, with roots tracing back to french rye farming peasants. These days, it’s a starting point for beginners learning to bake sourdough rye bread at home. There’s enough rye in this bread to provide excellent flavor, but not so much that it’s difficult for beginners to successfully bake at home.
If your goal is to eventually bake a 100% rye sourdough bread, this loaf will show you the basics of rye sourdough baking, and put a few quick encouraging successes under your belt.
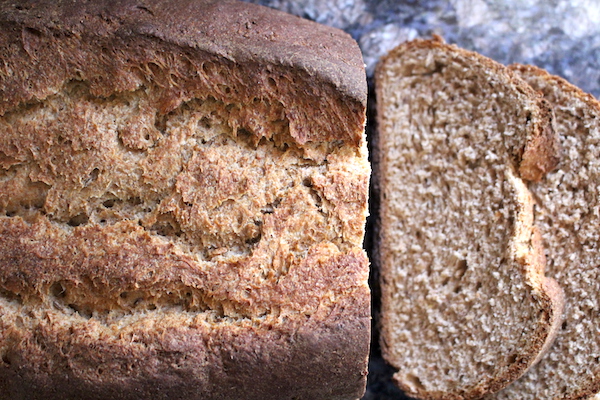
What is Pain de Méteil?
Literally “bread of mixed grains,” a méteil loaf is part wheat and part rye. It’s often around 40-50% rye flour, so not quite enough to be considered a “rye” loaf which is called “pain de seigle” once it’s considerably more than half rye. In the book The Breads of France this loaf is described as a compromise by French peasants:
“In earlier times pain de méteil or maslin was an endeavor to upgrade the appearance of dark, all-rye bread by adding an equal portion of precious white flour. The result was, and is, a loaf of simple, forthright, substantial bread. Now it is made because it is good bread, not because it is all there is available….
While pain de méteil can be made with finely ground medium rye flour, the loaf better reflects its peasant origins with stone-ground or pumpernickel flour. It goes especially well with meats, soups, and leafy salads.”
It was commonly eaten by French peasants that had poor, rocky soil and could only grow rye rather than wheat. What wheat flour they could buy was precious, and they devised ways of extending it in a mixed loaf such as this one.
Though méteil breads were born out of necessity, these days they’re a luxury. It’s hard to find a well made whole grain loaf, and while historical tastes yearned for smooth white bread, our modern stores are full of it. While this rye méteil could be made with rye and white flour, it’s instead made with rye and whole wheat for a more substantial loaf that satisfies our craving for that old school cooking that’s finding its way back onto our modern tables.
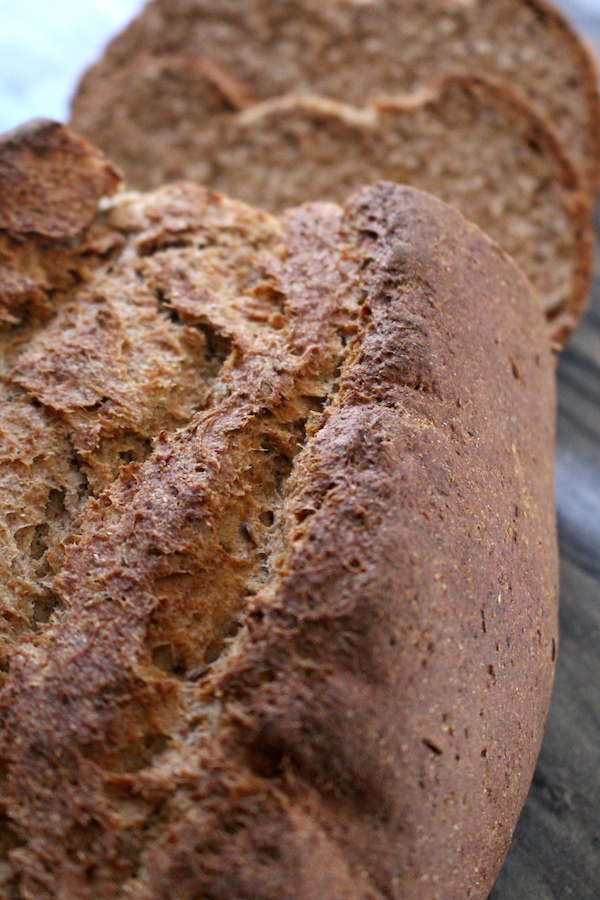
How to Make Méteil Bread (Mixed Rye & Wheat)
The first step in this whole process is a rye sourdough starter. A homemade rye sourdough starter takes about a week of tending, stirring several times a day, before it’s ready to bake a loaf. Make your own, or if you prefer, you can purchase an all-rye sourdough starter on Amazon, or directly from Cultures for Health. Either way, a well-kept sourdough starter can last years if not generations, so it’ll be valuable to have on hand for future loaves as well.
If you’ve tried to bake rye bread without using a sourdough method and failed, you’re not alone. Without sourdough fermentation, I’d never had a successful rye loaf, and now I know why. According to Peter Reinhart, “Rye flour contains more enzymes than wheat, and if unchecked, heightened enzyme activity can damage the structural integrity of the dough. The acidity of the starter will control the enzymes, protecting the starches in the dough from attacks during the bake.”
The sourdough rye bread recipe I’m using to make this loaf uses Peter Reinhart’s delayed fermentation technique, as described in his book Whole Grain Breads: New Techniques, Extraordinary Flavor. The full technique, including the reasoning behind it, is described in the book, and I’d highly recommend it if you plan on making more than one or two whole grain loaves in your lifetime.
This recipe starts as two parts in two different bowls, a whole wheat soaker and a rye sourdough starter.
- Whole Wheat Soaker ~ The whole wheat soaker involves whole wheat flour, water and a bit of salt. This is kneaded until it comes into a ball, and then left covered at room temperature for 12-24 hours. There’s no yeast in this mixture, so the initial pre-dough stage is just for enzymatic activity.
- Rye Sourdough Starter ~ This more active starter mixes a bit of rye sourdough starter with rye flour and water to form a wet dough. The mixture is kneaded for about 5 minutes until it’s smooth, but it’s still a very wet, sticky starter dough. This starter is left at room temperature for roughly 4-6 hours, or a bit longer in a cool house, until doubled in bulk.
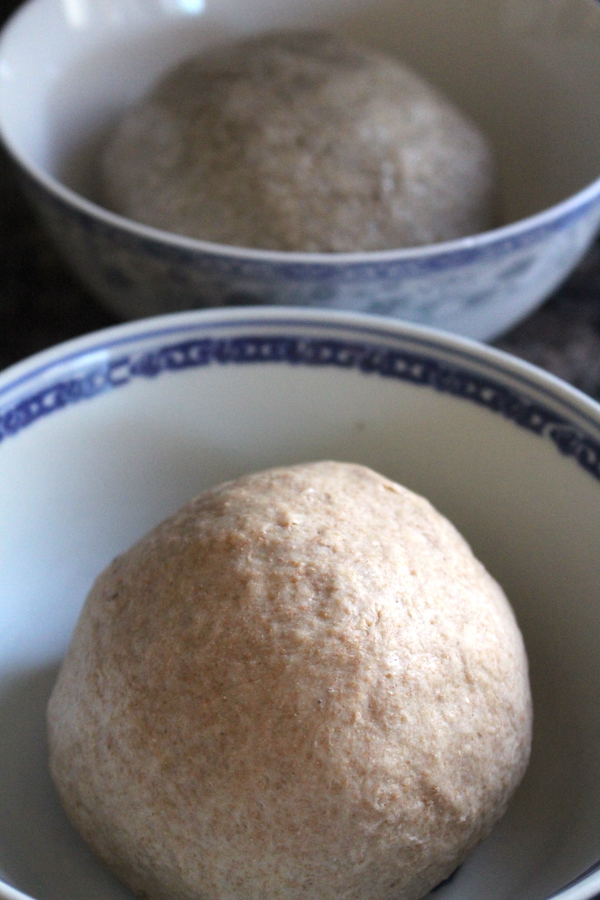
These two pre-doughs are then mixed together along with the remaining ingredients including more flour, salt, honey/maple, caraway seeds, butter, and commercial yeast. You’ll notice that the sourdough is used to condition the rye flour in this loaf, but it’s not the only source of leavening, as standard yeast is added when the pre-doughs are combined for proofing.
Once the final dough is prepared, it’s proofed, shaped and baked in much the same way as any other loaf.
It’s important to ensure that the gluten is well developed before proofing, and this is done with the “windowpane test.” Take a small piece of dough and stretch it until it’s very thin. It should be so thin that when you hold it up to a sunny window, light can pass through it because it’s almost transparent. If it can be stretched this thin without breaking, then the loaf has been kneaded enough and it’s time to allow it to rise.
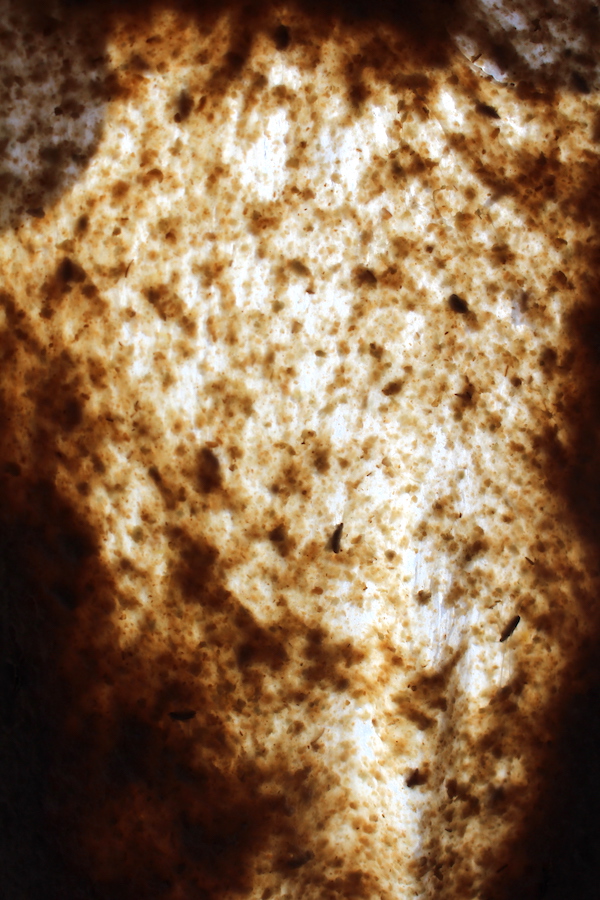
For the rise, place the dough in a fresh clean bowl that you’ve oiled with a bit of olive oil. Turn the dough ball around a bit in the oil to ensure that the oil covers all sides. This helps keep the bread moist during the rise, and adds a bit of oil to the final loaf which helps condition the dough.
After the first rise, punch down the loaf and shape it into a bâtard. Here is a detailed description and video that demonstrates how to shape a bâtard. Or, if you prefer, bake it in whatever shape you like and are comfortable making at home.
While the dough was sticky throughout the whole process due to the rye flour, adding a tiny bit of flour to the surface at the end for shaping makes it easy to form a beautiful loaf. The dough is remarkably firm and stands up well during and after shaping.
After you master this mixed grain loaf, Peter Reinhart suggests moving up to a 68% rye sourdough, or “pain de seigle.” That means “rye bread” in French, and now that there’s well more than 50% rye in the loaf it can properly be called a rye bread, even if it’s not 100% rye.
After mastering that loaf, you’ll be ready to try making a 100% rye sourdough bread…which is considerably more difficult to master. All rye bread is also a bit harder to adjust to given our modern tastes. Even the french rye growing peasants spend their meager incomes to get even a bit of wheat flour to mix in, which might signal that it may be challenging to enjoy on a daily basis. Still, I’m excited about it as a fun project and new skill to master.
Moving on to higher rye percentages is completely optional though. This is a fabulous loaf that my toddlers enjoyed slathered with butter. Feeding it to a 3-year-old without complaint is a success in my book one way or the other. So even if you never plan to add more rye, just make this basic part rye sourdough, enjoy it for its tasty mild rye flavor and call it a day. Either way, it’s up to you.
Sourdough Rye Hearth Bread
Ingredients
Soaker
- 1 3/4 cups whole wheat flour
- 1/2 tsp salt
- 3/4 cup water
Starter
- 1/3 cup rye mother starter, or whole wheat mother starter
- 1 2/3 cups whole rye flour
- 3/4 water
Final Dough
- All of the soaker & starter above
- 7 tablespoons whole wheat flour, or whole rye
- 5/8 tsp salt
- 2 1/4 tsp SAF Instant Yeast
- 1 Tbsp honey, maple or molasses (optional)
- 1 Tbsp butter, melted (optional)
- 2 tsp caraway seeds, optional
Instructions
- Mix all soaker ingredients in a bowl and knead about 1 minute until they come together into a ball. Cover and leave at room temperature for 12-24 hours.
- In another bowl, mix the starter ingredients and knead with wet hands for about 2-3 minutes. Let rest 5 minutes, and then knead again for another 1-2 minutes. The dough will be very sticky, keep wetting your hands to keep it from sticking, but don't add additional flour. Cover and allow to rise at room temperature for 4-6 hours. (The starter can be started later than the soaker, or if started at the same time, it can be placed in the refrigerator after the initial rise to coordinate timing. If placed in the refrigerator, take out 2 hours before making the final dough to allow it to come to room temperature.)
- When both the soaker and starter are ready, bring them both to room temperature (if either has been in the fridge to coordinate timing). Chop both the soaker and starter into 10-12 small pieces each, and place the pieces in a stand mixer with all of the other final dough ingredients (or in a bowl to do it by hand).
- Attach the paddle attachment and beat the mixture for about 1 minute to bring the dough together. Switch to a dough hook and knead 8-10 minutes, occasionally scraping down the bowl. Kneading with a dough hook helps avoid the temptation to add additional flour during kneading, which will toughen the loaf. Alternately, combine the doughs and knead by hand, using wet hand to avoid sticking. The dough should still be quite tacky, but hold together in a firm ball.
- Allow the dough to rest 5 minutes, then knead for another 1 minute by hand, using a small amount of flour to prevent sticking during this final knead. The dough should pass the windowpane test (described above). If not, continue kneading until the dough strengthens.
- Oil a clean bowl and place the fully kneaded dough into the clean bowl, rolling it a bit to cover all sides in oil. Cover, and allow the bread to rise for about an hour, until doubled in bulk.
Punch down the loaf, and form it into a batard loaf shape. Allow it to rise covered with a towel for an hour, until doubled in bulk. Score the loaf, and prepare the oven for baking. - Preheat the oven to 475 degrees. Add a pan with 1 inch of water to a bottom shelf in the oven (to add steam to the oven during baking for a better crust).
- Place the bread pan in the oven above the steam pan, and immediately turn the oven down to 425 degrees. Bake for about 20 minutes, turn the pan 180 degrees and then bake for 20-30 minutes more.
- Remove the bread from the oven to a cooling rack and cool at least 1 hour before cutting.
More Bread Recipes
Keep that bread oven baking!
- Amish White Bread (Milk Bread)
- Butter Top Sourdough Sandwich Bread
- Light Rye Sourdough Boule
- Buttery Sourdough Buns
- Spent Grain Bread
- Cinnamon Raisin Bread
- Bread Machine Whole Wheat Bread
- Bread Machine White Bread
It came out nice.my childrens loved them.
Here is my first loaf of Pain de Mateuil. I have had several months making Ken Forkish style sourdough….this loaf just out of oven. I wish I could post a photo
Thanks for sharing, Lana! I hope it turned out well!
ccan this be baked in a dutch oven
Yes, definitely!
Can we have some kind of a clearer idea what 1/3 cup starter means? Starter tends to rise and fall, so I find it infeasible to measure it like that. Presumably it means something to you, though.
Perhaps you could say how much water and flour you expect to put in to make that quantity of starter. Many thanks.
Can I substitute sourdough starter with whole wheat flour for the soaker?
I would love to see the amounts in grams, if possible.
Sorry, I didn’t weigh my ingredients.