This post may contain affiliate links. Please see our disclosure policy.
Klejner are delicious, but since they’re deep-fried, they’re not exactly politically correct in today’s food environment. They’re a real treat, and the perfect little indulgence, especially around the holidays.
It’s my personal favourite and I dare you to make it and not fall in love with it. You could even make them the old fashioned way (with lard) for an even better tasting klejne.
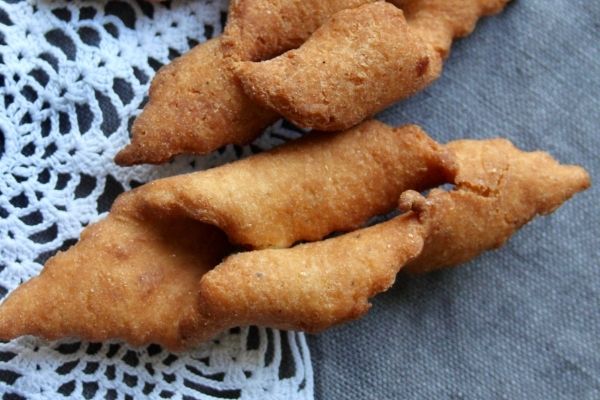
How and When Danes Eat Klejner
Let me be completely honest with you. Klejner are my personal favourite of all the Danish Christmas cookies. That said, I’m also a very harsh critic of klejner.
Danes only eat klejner at Christmas. They are available as mass-produced dry little things from the supermarkets. You can get decent ones from the better bakeries and at Christmas fairs and markets. These are often oversize and according to some, aka my husband, they become vile because there’s simply too much of them. If you generally like the concept of fried dough, you might disagree.
The best klejner are served by my sister-in-law on the first Sunday in Advent. I can’t get you an invite but I did convince her to share her recipe with us.
I’ve loved klejner since I was first allowed to have cookies but in general, klejner is a bit more of a grown-up cookie. Children tend to gravitate to the pebernødder if there are any around.
Klejner go well with a cup of coffee or tea and some even dip them in coffee as they are able to soak up a decent amount.
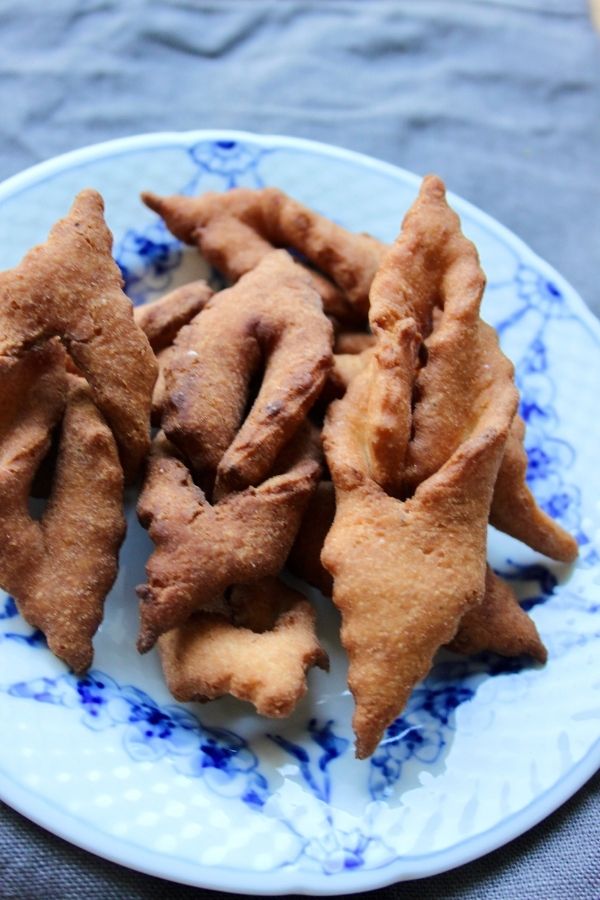
The History of Klejner
Klejner are amongst the oldest of the Danish Christmas cookies. They have been made in a pot over open fire since medieval times but even the advent of the woodstove with an oven didn’t put this cookie out of favour.
The first time Klejner is recorded in history is in a Latin-Swedish dictionary from the 15th century. The Latin word laganum, which was a small piece of dough fried in lard and seasoned with honey, was translated as kleneth.
The Danish word klejne is first recorded in a cookbook from 1766.
It’s unknown where klejner originates from but the name is thought to come from the Low German kleinet, which means small. This may be an indication of its origin. But as the french sounding risalamande proofs, we can’t be sure merely based on the name.
Klejner has been known under many names such as vridpibe, vridefitte, snofitte, fugleunge, fedtfugl and skrædderlår. That we mainly call it klejner today could be because it fell under the category of kleinbrot (small bread) and was made by a special baker known as a klein baker in the 18th century (Source).
Specialty Equipment, Ingredients & Techniques
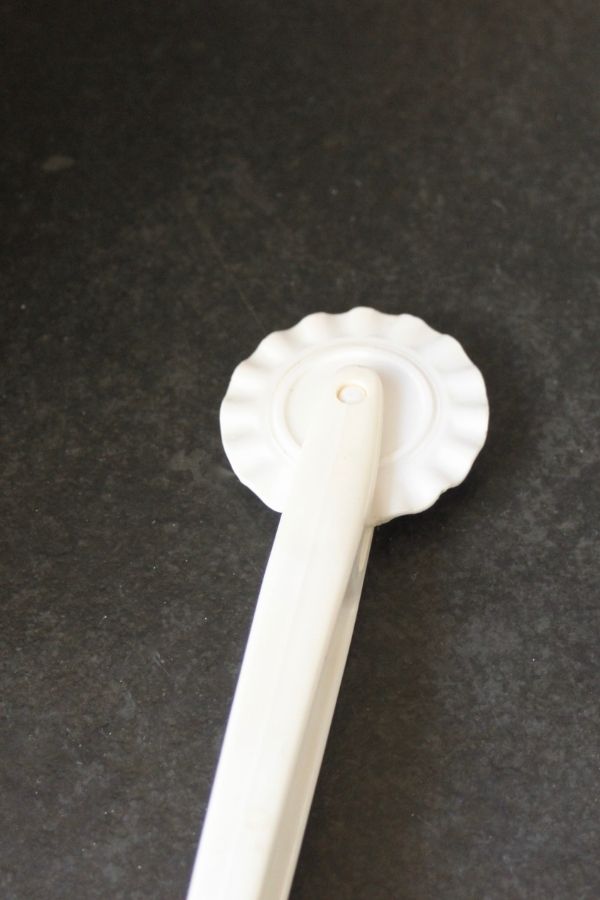
Klejnespore
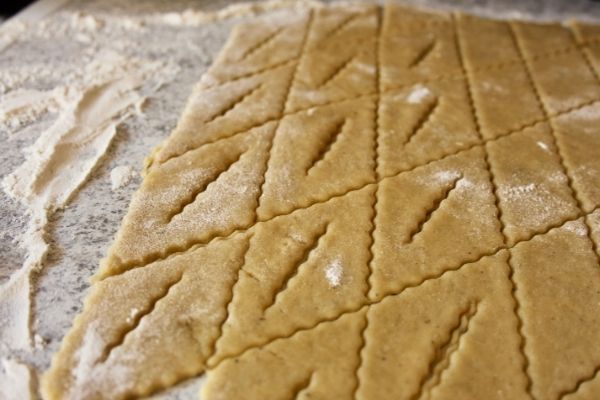
A klejnespore also known as a kagespore or a klejnejern is used to give klejner their characteristic edge.
There are two kinds (at least) of klejnesporer. One has a single blade with a characteristic edge. This tool gives you the freedom to make klejner of the size you prefer. Technically, this tool is called a kagespore, but many refer to it as a klejnespore.
The other kind makes all the cuts for you in one go as you roll it across the dough. This is very effective if you plan to go into high production mode. This tool is a proper klejnespore.
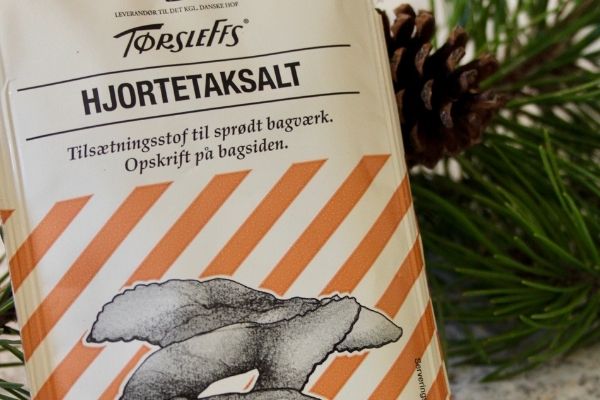
Hartshorn salt
Hartshorn salt has the chemical formula (NH4)2CO3. It’s also known as baker’s salt, Baker’s ammonia or ammonium carbonate.
This leavening agent is a special Danish baking ingredient and can be difficult to come by. If you plan on making a few different Danish Christmas cookies, it’s well worth the effort to seek it out.
In a pinch, you can use 1 tsp baking soda AND 1 tsp baking powder to replace 1 tsp hartshorn salt. I have never had klejner made without hartshorn salt so I can’t vouch for the quality.
Twisting Klejner
To twist klejner, at vride klejner, is a job that requires practice to be able to do well. If you don’t get it right, it’s really not a big deal. Your klejner won’t be as pretty but it doesn’t affect the taste.
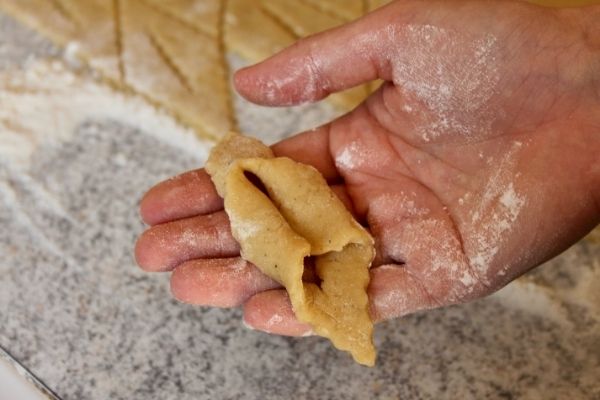
You have to put one end of the klejne through the slit in the middle. It sounds simple but wait till you try it. When seasoned bakers do it, it’s a joy to watch.
First, open the slit in the middle.
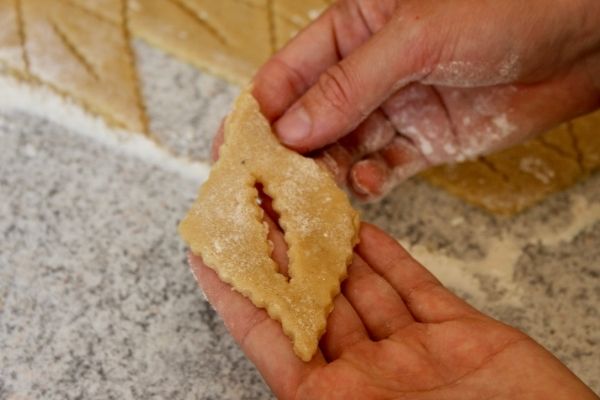
Next, fold over the top end and pull the end through the slit.
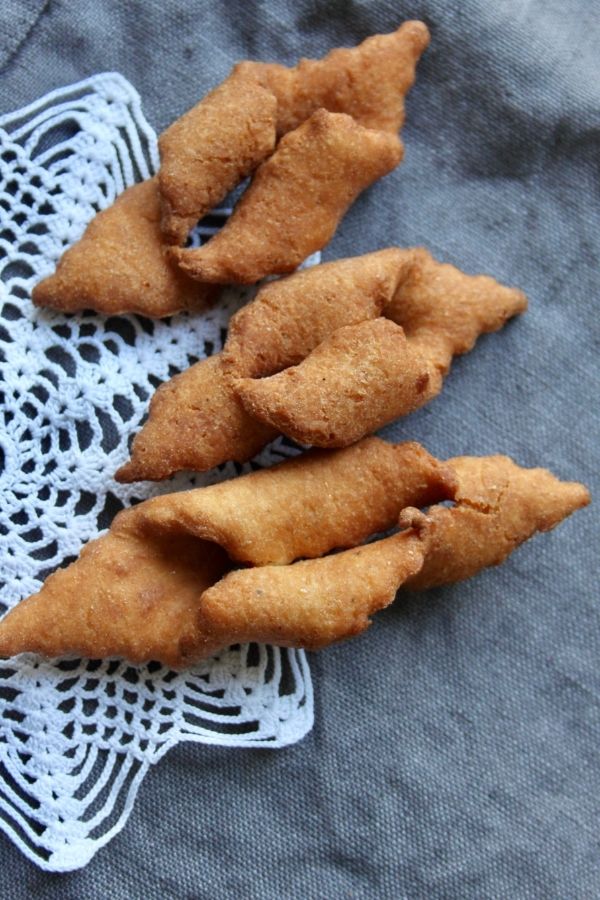
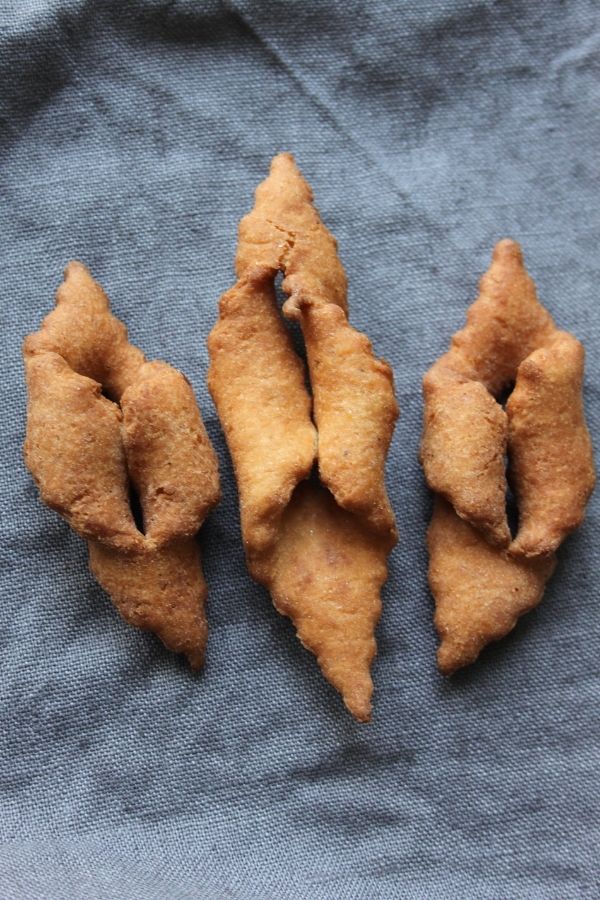
This is what your fully turned klejne should look like. It’s now ready for frying.
This 1 min video illustrates how to cut klejner with a klejnespore, kagespore or knife, how to twist the klejner as well as fry them.
It’s very good for such a short video:
Variations in Denmark
Cinnamon – some use cinnamon instead of cardamom as the main spice. Make sure to use real cinnamon and not cassia cinnamon, if you give it a go.
Lemon – lemon zest is a common variation in klejner.
Cream – for a richer taste, some use cream instead of milk.
Cognac – some add cognac to the dough. I’ve never had any so I can’t tell you if it’s good. Give it a try if you are partial to alcohol in your baked goods.
Klejner in Other Countries
Klejner are known all over the Nordic countries.
In the south of Sweden they are called klenät, In Norway, they are known as fattigmann, in the Faroe Islands as kleynur, in Iceland as kleinur, and in Greenland as utsuusat.
In Norway, klejner usually come with a lemon glazing. Sometimes a bit of yellow food colouring is even added to the glazing. These become too sweet for my taste, but children tend to love them.
Klejner Ingredients
Flour – Use pastry flour or all-purpose wheat flour. Make sure the flour isn’t self-rising.
Butter – Use the best kind you can get. Fresh and organic is preferable. Don’t use margarine for this recipe.
Sugar – Use white granulated sugar.
Eggs – Farm fresh and organic eggs are the way to go. Don’t use old eggs.
Milk – Use fresh, organic whole milk or be decadent and use heavy cream instead.
Hartshorn salt – If you can’t get hartshorn salt you may be able to substitute it for 1 tsp baking soda and 1 tsp baking powder. I’ve never attempted this, so I can’t guarantee the result.
Cardamom – Use freshly ground cardamom pods or at least a fresh batch of pre-ground cardamom.
Palmin – This is the not so politically correct part. Palmin is refined coconut oil. It’s wonderful for frying klejner and since most who make klejner only make one batch a year, the less than 36 oz needed is not viewed as a big deal by most Danes. If you would like to stay clear of palmin, you can fry the klejner the traditional way in lard. This makes for a truly delicious klejne but since good lard is very expensive and not easy to come by in Denmark unless you can make your own, most people use coconut oil (palmin).
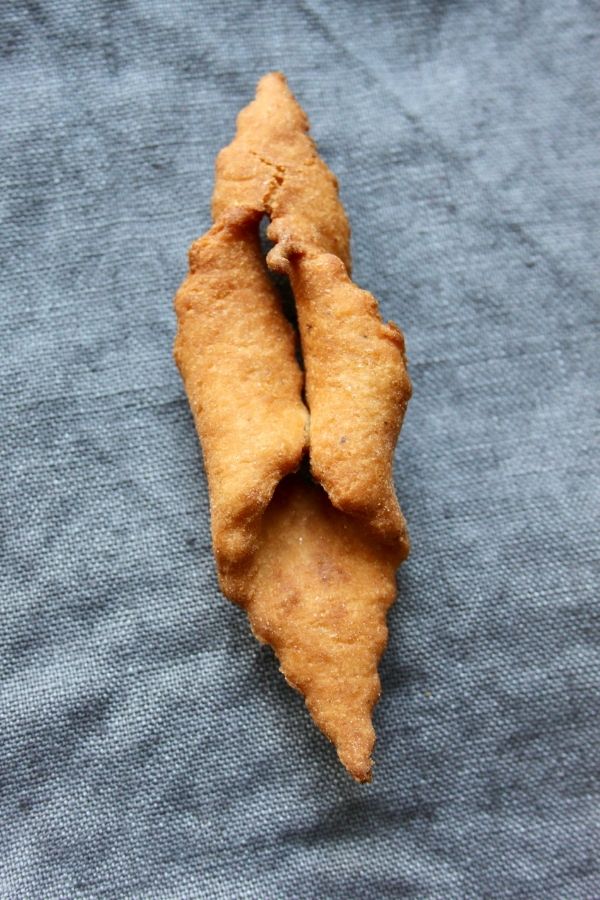
How to Make Klejner
The first part of making klejner is great fun with children. This, however, is not a child-friendly recipe as such. If you want to involve children, then take great care during the frying process.
Start off by mixing the sugar, eggs, hartshorn salt, and cardamom well.
Then crumble the butter into the mixture.
Add the milk and flour and get to work. Mix the dough until it’s fully combined.
Brew a cup of coffee to enjoy while you let the dough rest for 10 min in a cold place like your fridge.
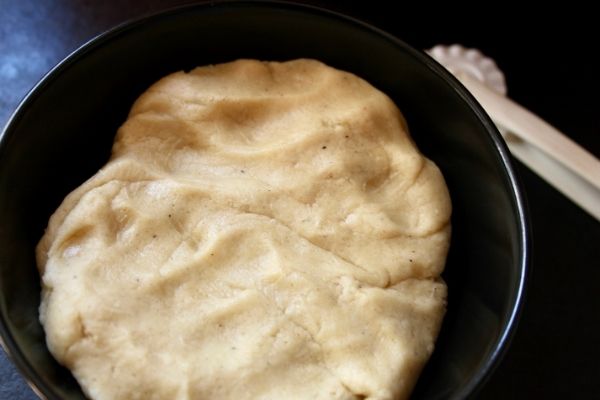
Now begins the real fun. Roll out the dough to roughly ¼ inch.
Get your klejnespore (or a plain old knife) and cut diamond shapes of 3 inches x 1 inch. Let the shapes stay put.
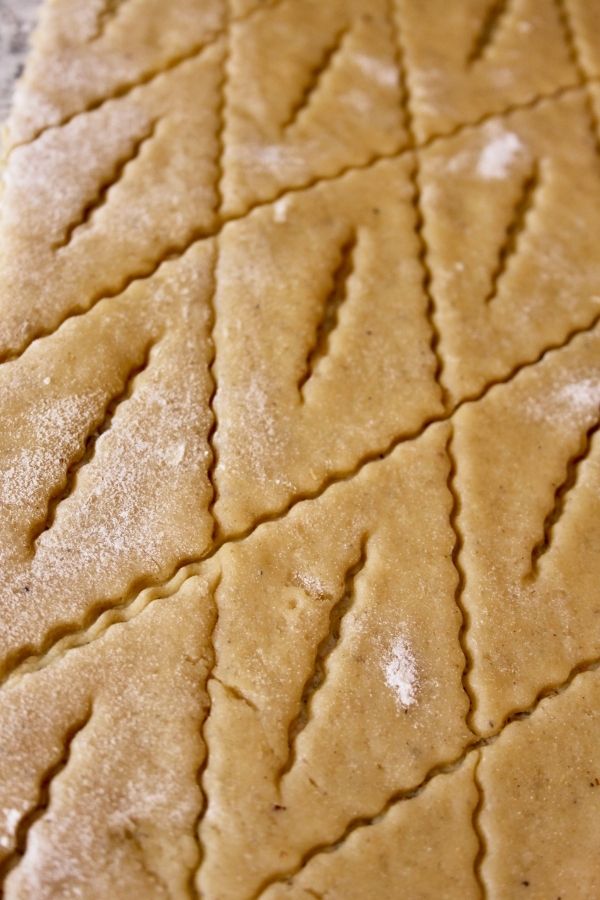
Cut a 1 inch line in the middle of every diamond with the klejnespore. This is the hole you will use to twist the klejne through. This takes practice but don’t worry, it won’t affect the taste.
Melt the coconut oil (palmin) or lard and fry the klejner in the oil. Turn them once they turn light brown at the edge and let them fry until golden. It should take about a total of 3 min. to fry a batch.
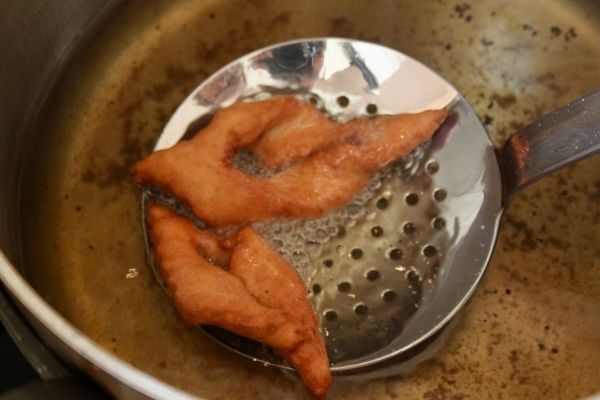
Place the finished klejner on a paper towel to remove the excess grease. We don’t want soggy klejner.
Continue the frying process until all the dough is used up.
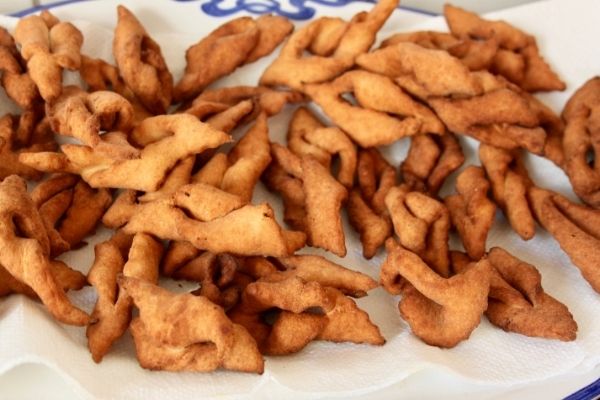
Let them cool and enjoy your hard work once they reach room temperature.
Klejner store well in an airtight container for at least a week.
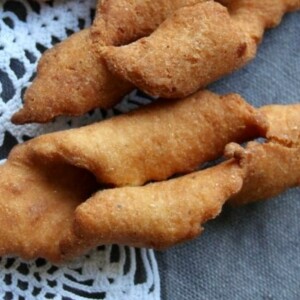
Danish Klejner
Ingredients
- 17.6 oz 500 g white flour (all-purpose)
- 3.5 oz 100 g butter
- 5.3 oz 150 g sugar
- 2 eggs
- 0.2 cups 0.5 dl milk
- 1 pinch hartshorn salt
- 1.5 tsp cardamom
- 35.27 oz 1 kg Coconut Oil (palmin) or lard for frying
Instructions
- Mix sugar, eggs, hartshorn salt, and cardamom well.
- Crumble the butter into the mixture.
- Add milk and flour and mix thoroughly.
- Let the dough rest in a cold place for 10 min.
- On a floured table, roll out the dough to a thickness of ¼ inch (0.5 cm).
- Cut the dough into diamond shapes of 3 inches x 1 inch (8 cm x 2.5 cm). Use a klejnespore for the traditional look. A knife will do in a pinch.
- Cut a 1 inch (2.5 cm) line in the middle of the klejne.
- Twist the klejne through the middle line.
- Fry in melted lard or coconut oil. Turn once light brown around the edge and continue to fry until golden. Total fry time should be around 3 min. for a batch.
- Place on a paper towel to remove excess oil. Repeat step 9 + 10 until all the dough is used up.
- Serve at room temperature. Store in an airtight container. Klejner store well for at least a week.
Further Reading on Klejner
http://www.journalistveteraner.dk/sprogmuseum/klejnens-historie-og-frikadellens/ https://da.wikipedia.org/wiki/Klejner
https://www.oetker.dk/dk-da/smaakagens-historie/smaakagens-historie
My grandmother immigrated from Copenhagen and she made this recipe all the time and it was so good and always made with love and now that she has passed away I want to make this again but I don’t know how so if there’s anyone who can give me some tips for making this recipe please let me know 🙏
My grandmother immigrated from Copenhagen and she made this recipe all the time and it was so good and always made with love and now that she has passed away I want to make this again but I don’t know how so if there’s anyone who can give me some tips for making this recipe please let me know 🙏
I love these! So many fond memories. My great grandfather brought his family’s “Kleiner” recipe with him from Denmark when he emigrated to the USA, and I grew up eating Kleiner every Christmas at my grandma’s house. I was talking with my wife about it and began trying to find a recipe for it so we can make some this year. I’m definitely going to try to rekindle the tradition. Thank you!
Wonderful, so glad you’re bringing the tradition back!
My great aunt Hilda made these every Christmas always one of my favorites at Christmas. Sadly I never learned how to make them & my only recipe is in Dane. I’m so excited to find this!
I grew up making these and eating them with my Danish Mom (50%) and her grandparents (they immigrated here). I have since taught my own offspring to make these and each year which ever one is around at Christmas time (both are now single adults) wants to make them with me. It is a real treat to enjoy them AND the tradition of making them with my 30-somethings. My recipe is very similar to yours and cardamom is a requirement (Penzeys please!).
Kleiner is how my family spells this delectable treat. My great-grandmother brought the recipe with her by memory from Denmark in the late 1800’s and my grandmother wrote down the measurement as best she could so the tradition of making kleiner would carry on. Here were are over 125 years later having kleiner with coffee just as my ancestors did. Our recipe is very similar to yours-thank you so much for sharing! I truly thought our family was one of the only kleiner makers and lovers in the US. So happy to know we aren’t alone.
You’re not alone! Thank you Mindy =)
My mother and son-in-law are gluten free so I tried using this flour
https://www.amazon.ca/Bobs-Red-Mill-Gluten-Free-Baking/dp/B07J3JGY74/ref=sr_1_1?crid=7OHJ74WBX9R9&keywords=bob%27s+red+mill+flour&qid=1640214512&sprefix=bob%27s+red+mill+flour%2Caps%2C99&sr=8-1
With your recipe, not really knowing what to expect.
I had to let the dough rest over night and when I took it out the next day it was one hard lump but surprisingly I was able to knead it back into a dough I could work with.
It rolled out fine but was a little brittle to work with so I wasn’t able to get the perfect shape but they fried up just about as I would expect and the whole family loved them celiac and non-celiac alike.
Next year I will maybe play with it a little bit to see if I can get a more workable dough but for this year my mom got a taste of her childhood that she hasn’t been able to for many years.
Thanks
I have made klejner for many years and tried this recipe. In Canada our flour is different than Denmark.
I found I had to use 50 gms more of butter for these, and I didn’t put any baking soda in. Without your salt I just used baking powder.
My favorite cookie from my Danish Grandmother. I lost her recipe and thought I was never to taste Klejner again as there don’t seem to be many Danes in Texas.. What an awesome all around great site you have.
Thank you so much. I hope you enjoy them!