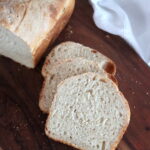
Sourdough Loaf Bread
Sourdough loaf bread is perfect for sandwiches, and it's also my favorite bread to toast or enjoy with a warm bowl of soup. This recipe is written for a single loaf, but I often double the recipe and make two.
Servings: 10 servings (one loaf)
Ingredients
- ⅔ cup active sourdough starter
- 1 ⅓ cups water warm water (90°F)
- 1 ½ tbsp olive oil
- 3 ⅔ cups flour preferably bread flour, but all purpose works too
- 1 1/2 tsp salt
- Oil for greasing the pan
- Extra flour for dusting the surface
Instructions
Mix the Dough:
- In a large mixing bowl, combine your bubbly, active sourdough starter, warm water, and olive oil. Stir gently until fully combined.
- Add the bread flour and sprinkle the salt on top. Use your hands or a wooden spoon to mix everything together until the dough is mostly incorporated. The dough should be a bit shaggy, not fully cohesive, and there should be no dry flour patches remaining. Don’t overmix!
- Cover the bowl with plastic wrap and let the dough rest for 1 hour.
Stretch & Fold Technique:
- After the initial rest, the dough should be much easier to work with, and the flour will have absorbed and incorporated all the liquid. Form the dough into a ball using your hands.
- Wet your hands lightly to prevent sticking. Stretch a portion of the dough upwards and fold it over to the center of the bowl. Turn the bowl a quarter turn and repeat the stretch and fold, doing this four times in total to complete one set.
- Cover the bowl and allow the dough to rest in a warm place for 30 minutes.
- Repeat this process every 30 minutes for 4-6 hours, or until the dough has increased in size by about 80%. As you stretch and fold, the dough will tighten up and become more structured.
- (If you forget to stretch and fold, don’t worry! It needs just 2-3 stretch and folds to come together and form a delicious bread that’ll get the job done. If you don’t do them all, the bread will still be delicious, but it won’t have quite as much structure and won’t rise quite as high. Still delicious and great bread, though.)
Forming the Dough:
- Grease a 9x5-inch loaf pan with oil or butter.
- Once the dough has risen sufficiently, transfer it onto a lightly floured surface. Use your hands to gently deflate the dough and shape it into a rectangle.
- Fold the right side of the dough to the center, then fold the left side over, like closing a book. Use a bench scraper if needed.
- Roll the dough tightly from the short side, tucking in the ends as you go. Carefully place the rolled dough into the prepared loaf pan.
Overnight Rise in the Refrigerator:
- Cover the pan tightly with plastic wrap and refrigerate overnight for 12-24 hours.
Baking the Bread:
- Preheat your oven to 450°F (232°C).
- Remove the dough from the refrigerator and allow it to rest at room temperature while the oven preheats, for about 30-35 minutes.
- Once the oven is preheated, uncover the dough and score the top with a sharp knife or bread lame, making a ¼-inch deep slit down the center of the loaf.
- Cover the loaf pan with another 9x5-inch pan (or create a makeshift cover with aluminum foil), and place the pan on the center rack of the oven.
- Bake, covered, for 30 minutes, then remove the cover and continue baking for another 20 minutes, or until the bread is golden brown and the internal temperature reaches 206-208°F (97°C).
- Let the bread cool in the pan for 15 minutes before transferring to a cooling rack. Allow the bread to cool completely before slicing, at least 1-2 hours.
Notes
Baking time can vary depending on your pan and oven. Dark metal pans tend to bake faster, while ceramic or glass pans may slow things down. Since oven temperatures also vary, start checking your loaf near the end of the suggested bake time—it might need a few minutes more or less to finish.
For Same-Day Baking: If you’re in a rush and don’t want to refrigerate the dough overnight, you can skip the refrigeration step. After shaping the dough, preheat the oven to 450°F (230°C) and let the dough rest uncovered while the oven preheats. However, for the best flavor and texture, an overnight rise is recommended.
Storage & Freezing: Store your sourdough in an airtight container at room temperature for up to a week. To freeze, wrap the entire loaf tightly in plastic wrap and then foil. For pre-sliced bread, store slices in a plastic bag with the air removed, or individually wrap each slice for longer storage in the freezer.
Can I use a Dutch oven? Yes! If you prefer a more rustic crust, use a banneton for proofing, and bake in a Dutch oven for the same results. Just follow the same instructions for scoring and baking.
Nutrition
Calories: 201kcal | Carbohydrates: 38g | Protein: 5g | Fat: 3g | Saturated Fat: 0.4g | Polyunsaturated Fat: 0.4g | Monounsaturated Fat: 2g | Sodium: 352mg | Potassium: 49mg | Fiber: 1g | Sugar: 0.1g | Calcium: 8mg | Iron: 2mg